
Installation Instructions
Follow these instructions to mount the Big or Little Basket Assembly to your bike.
Tools needed:
+ M4 and M5 hex key
+ crescent wrench or 10mm wrench
+ a felt tip marker
+ a saw or other appropriate tool that can cut aluminum
+ a file or sandpaper
+ grease for fork eyelet bolts
+ torque wrench (optional)
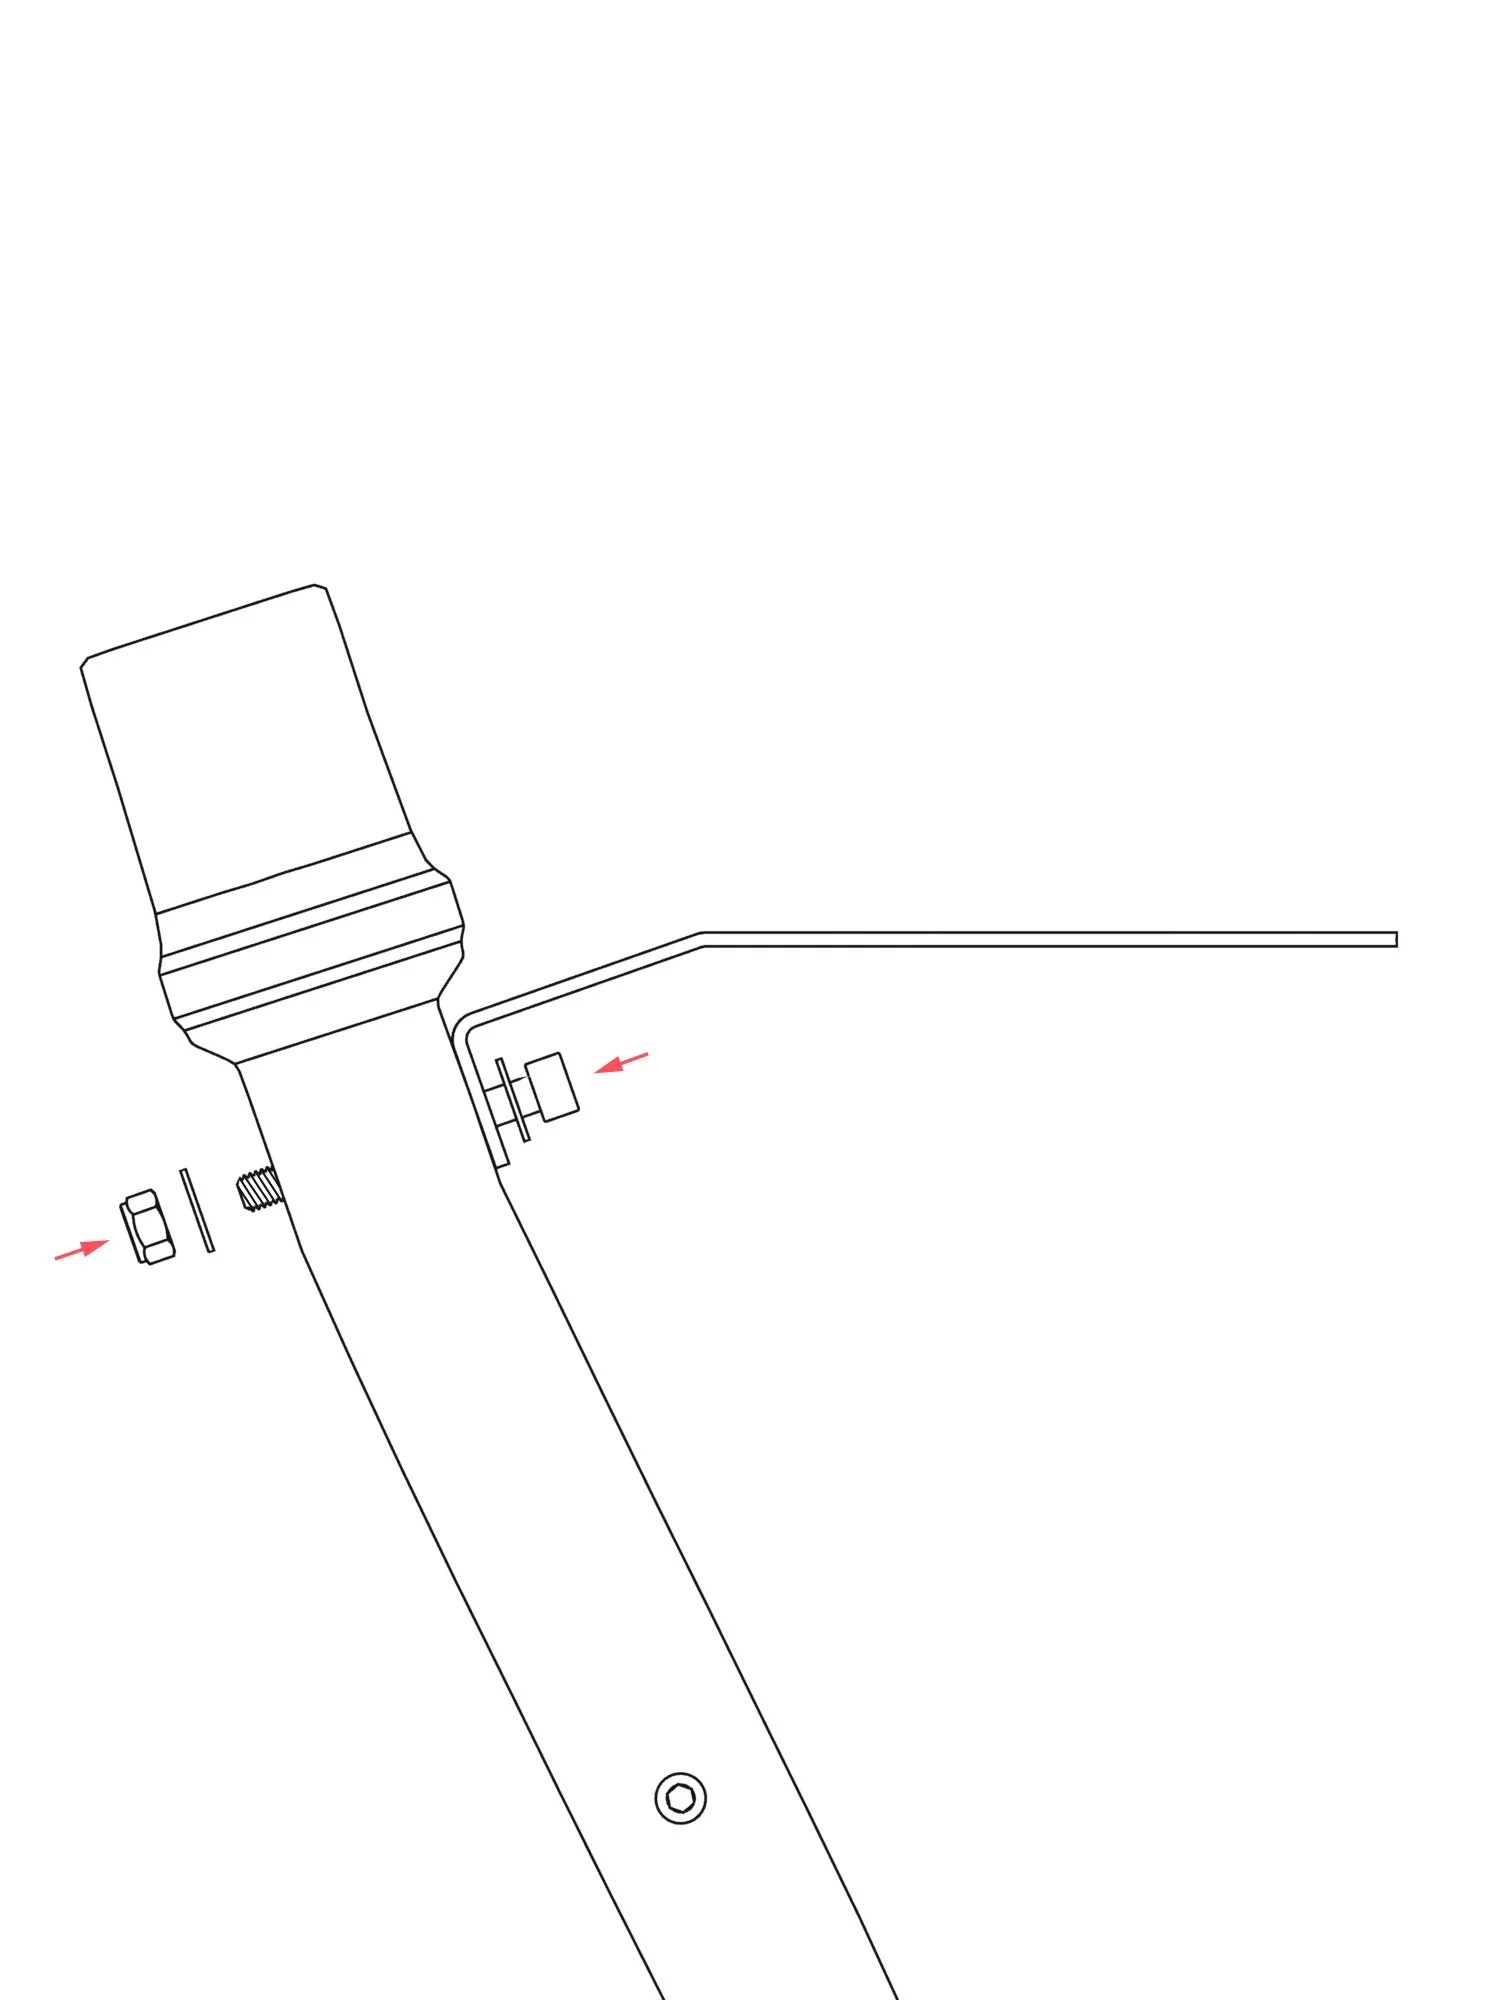
Step 1:
Mount the strut to the fork crown with the 45mm or 60mm M6 bolt.
The included spacer can be used to offset the strut for more clearance from the headset if needed.
Lightly tighten the bolt to allow for adjustment.
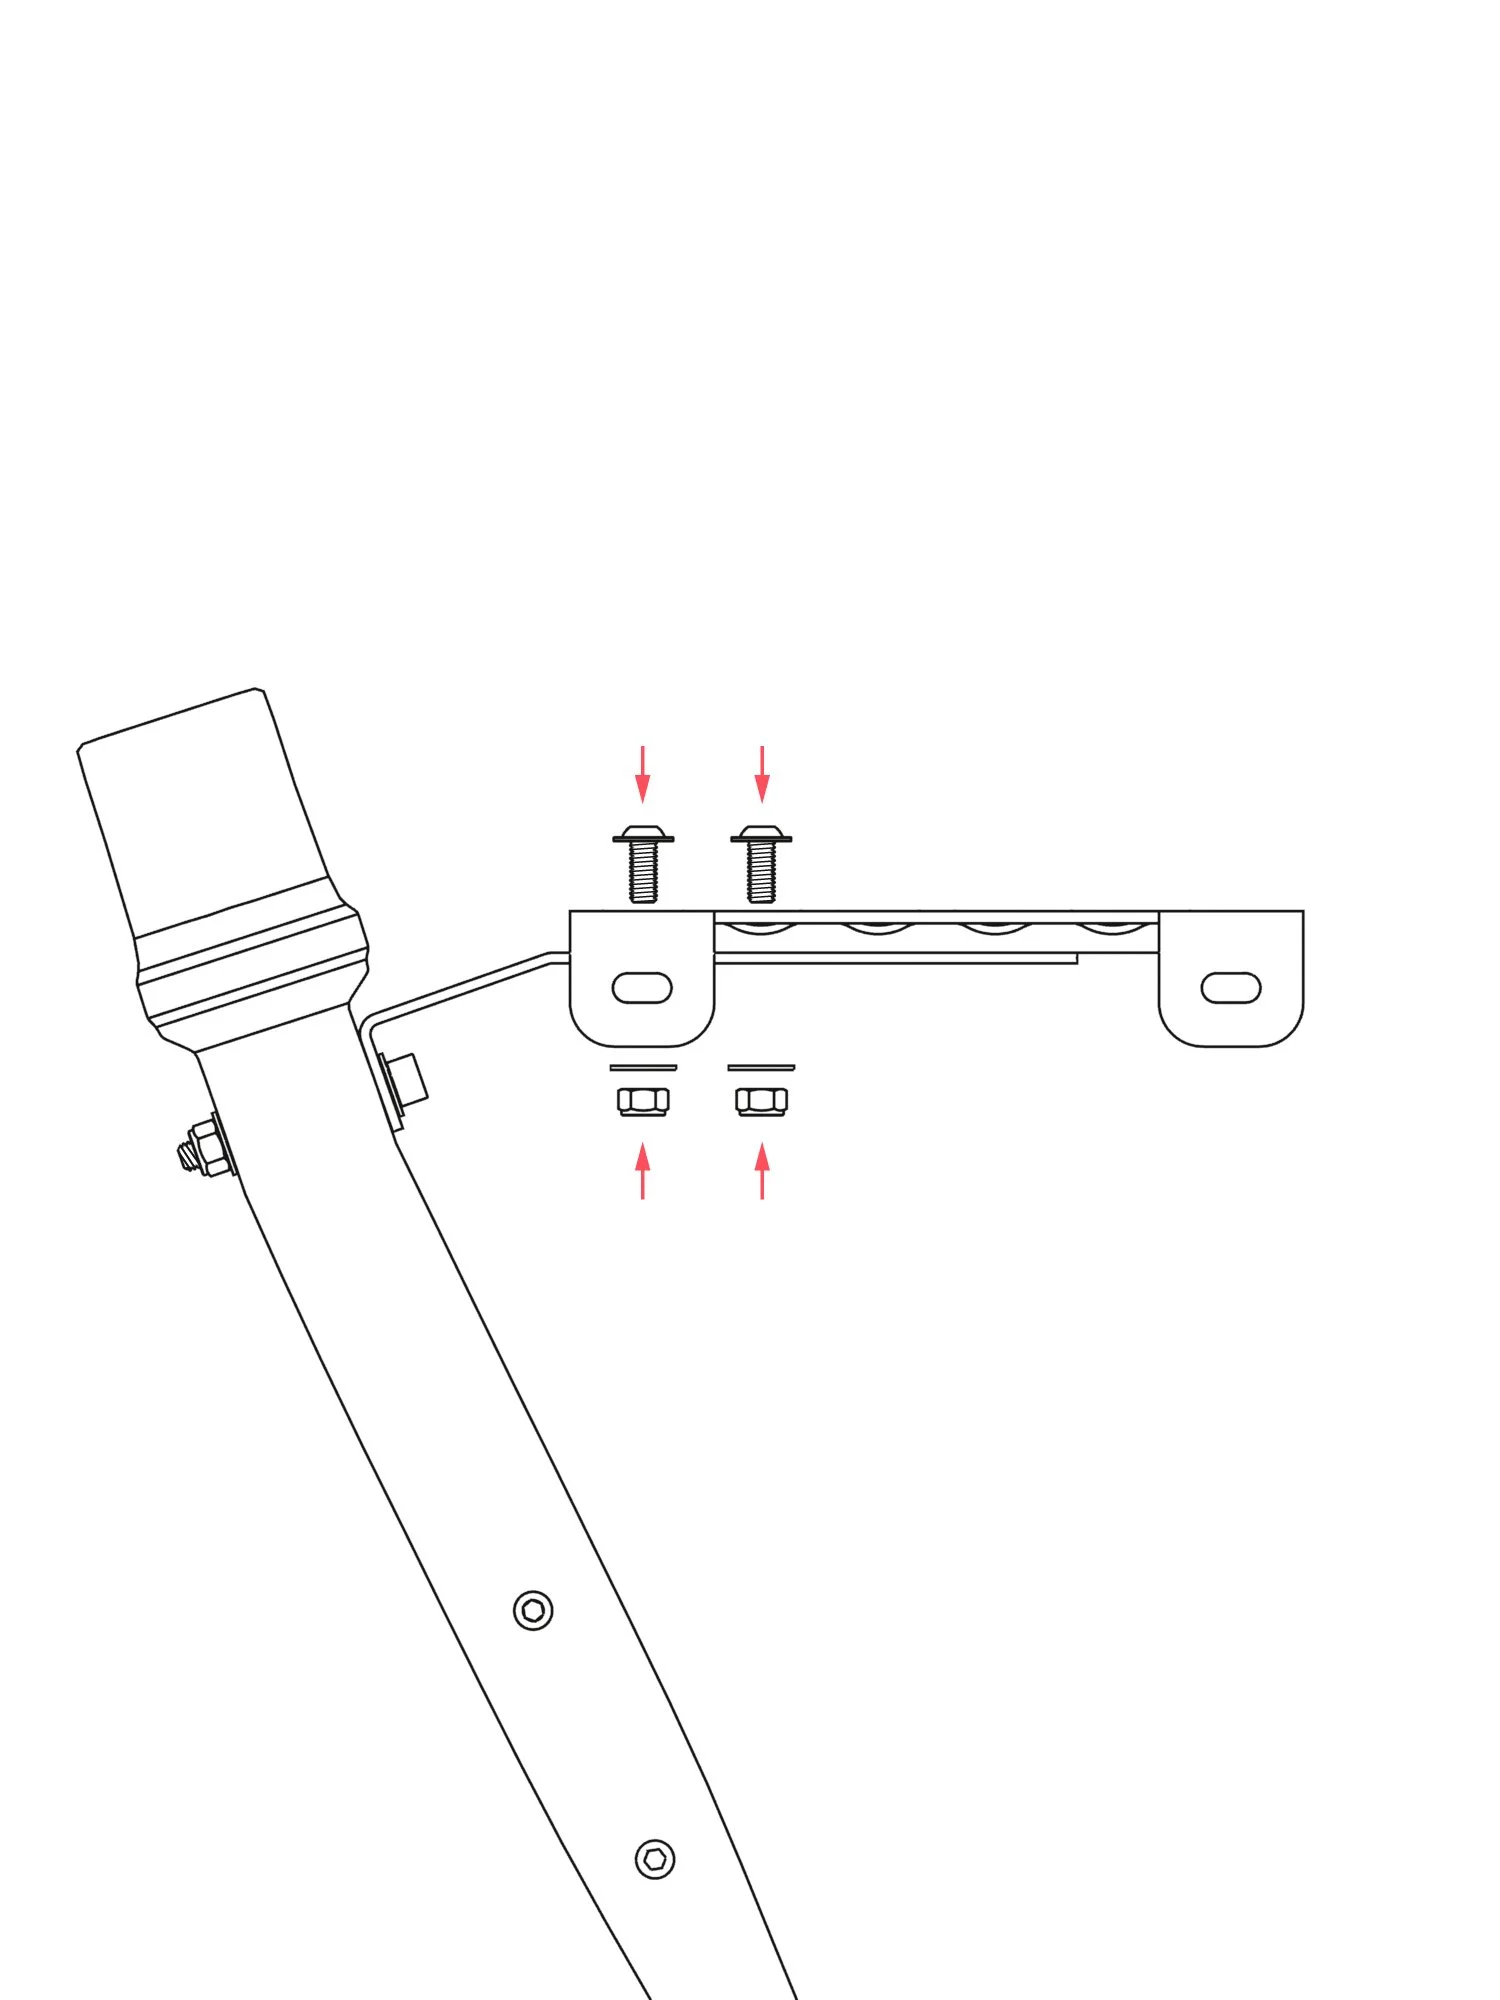
Step 2:
Mount the base to the strut with two of the M6 × 14mm bolts.
Make sure that the washers mount on the side with the nuts.
Lightly tighten to allow for adjustments.
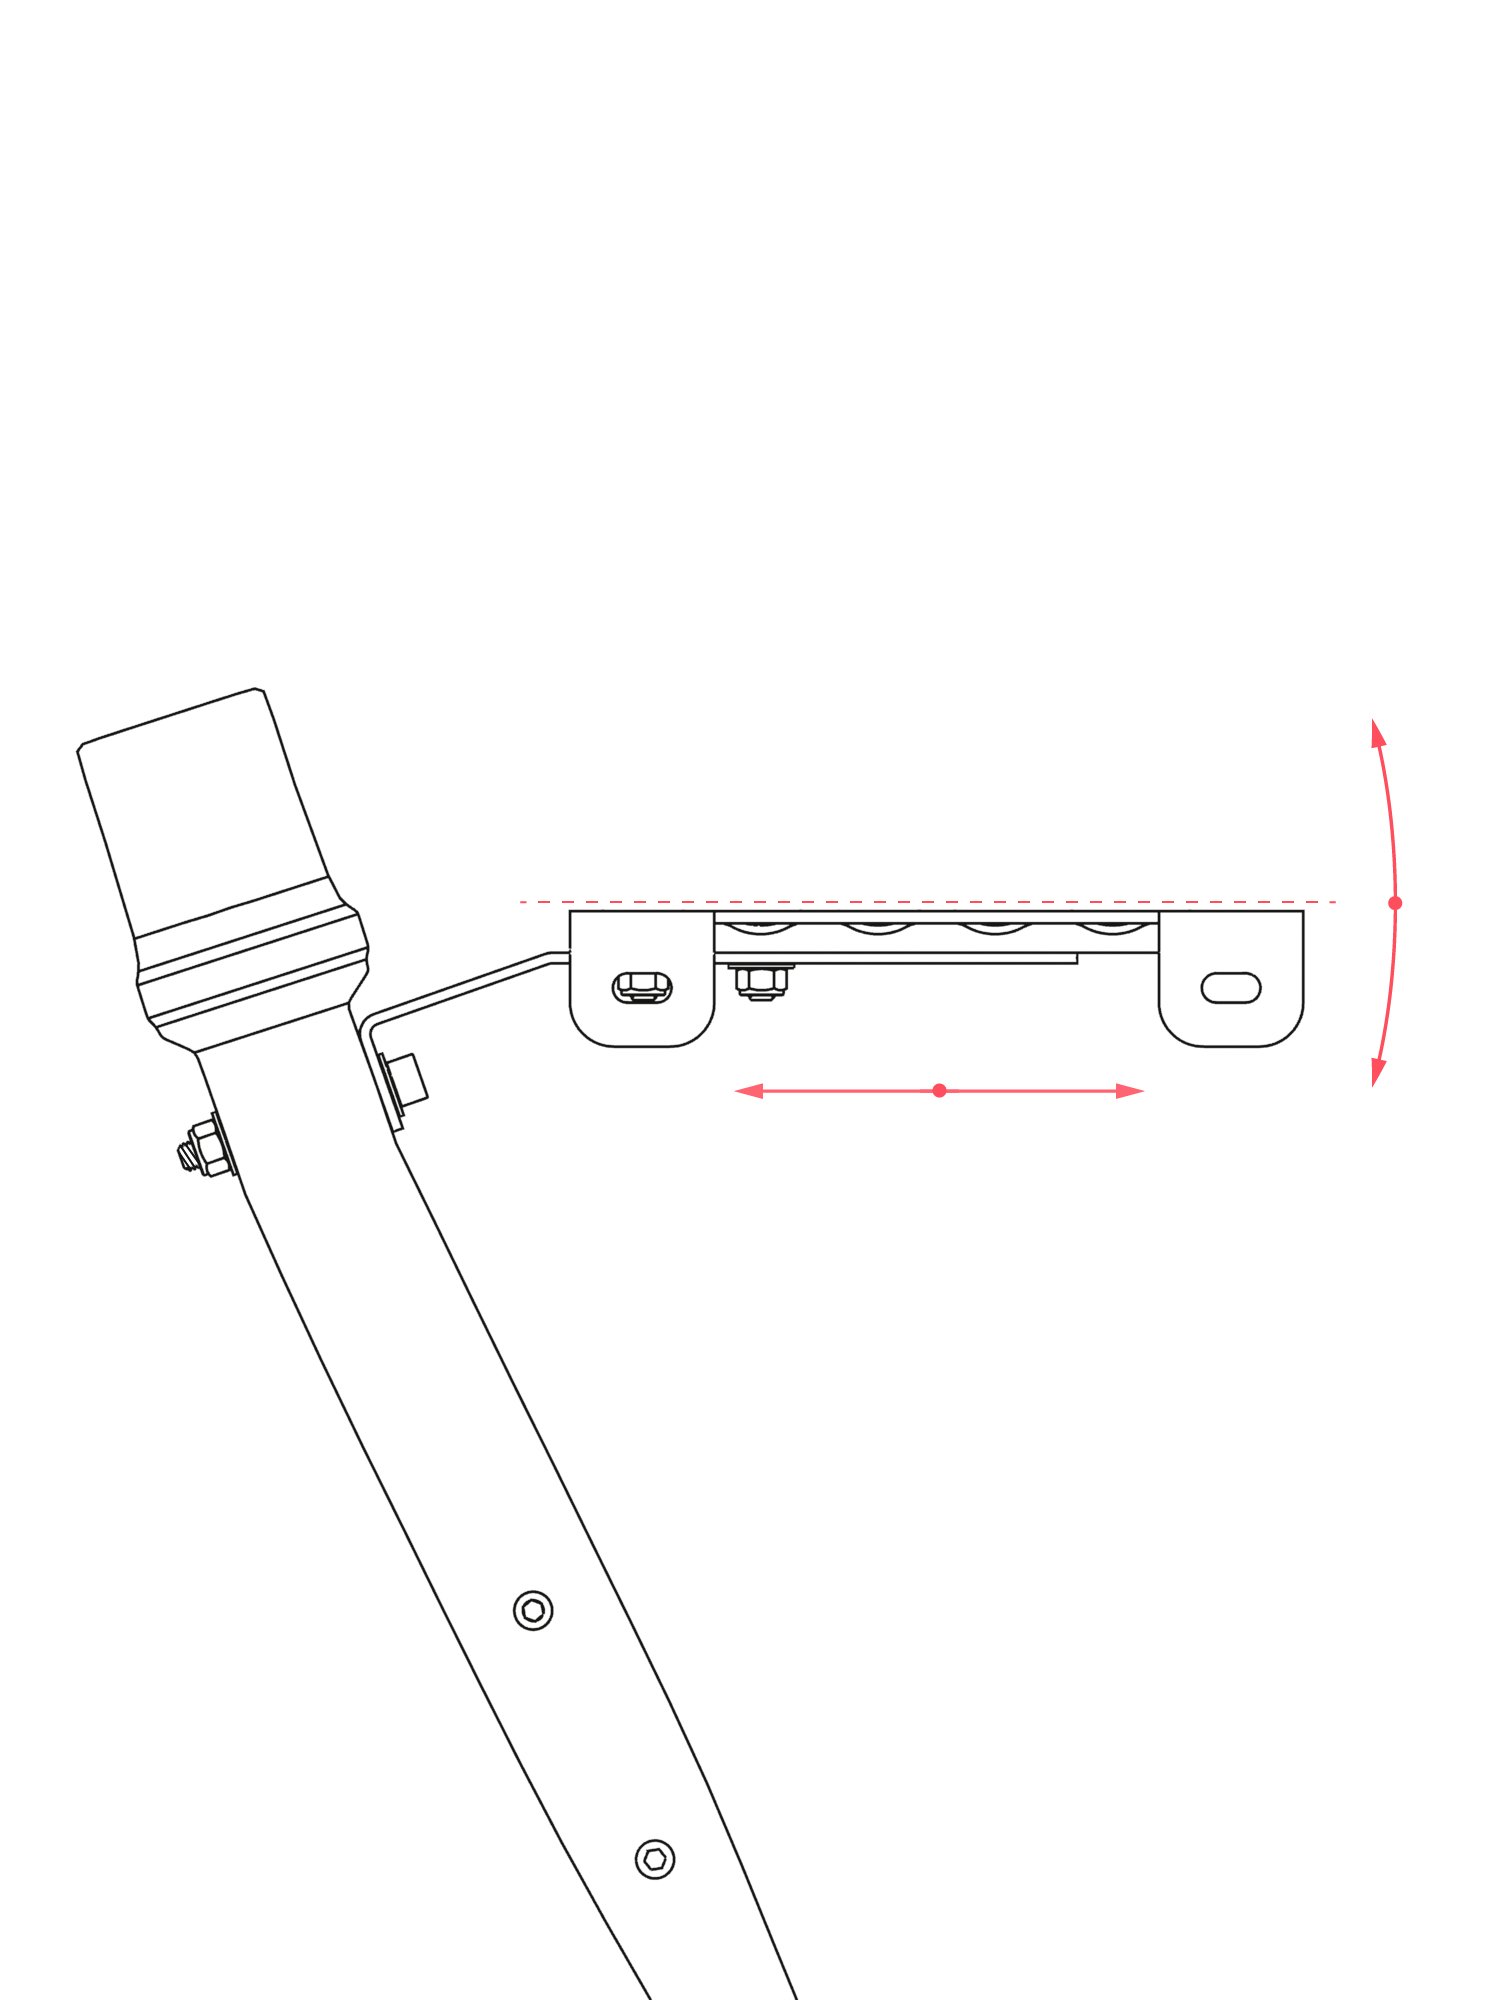
Step 3:
If needed, bend the strut to level the base.
Adjust the base position to your desired location on the strut.
Double check the position of the base with the basket and make sure it is in a position that you like.
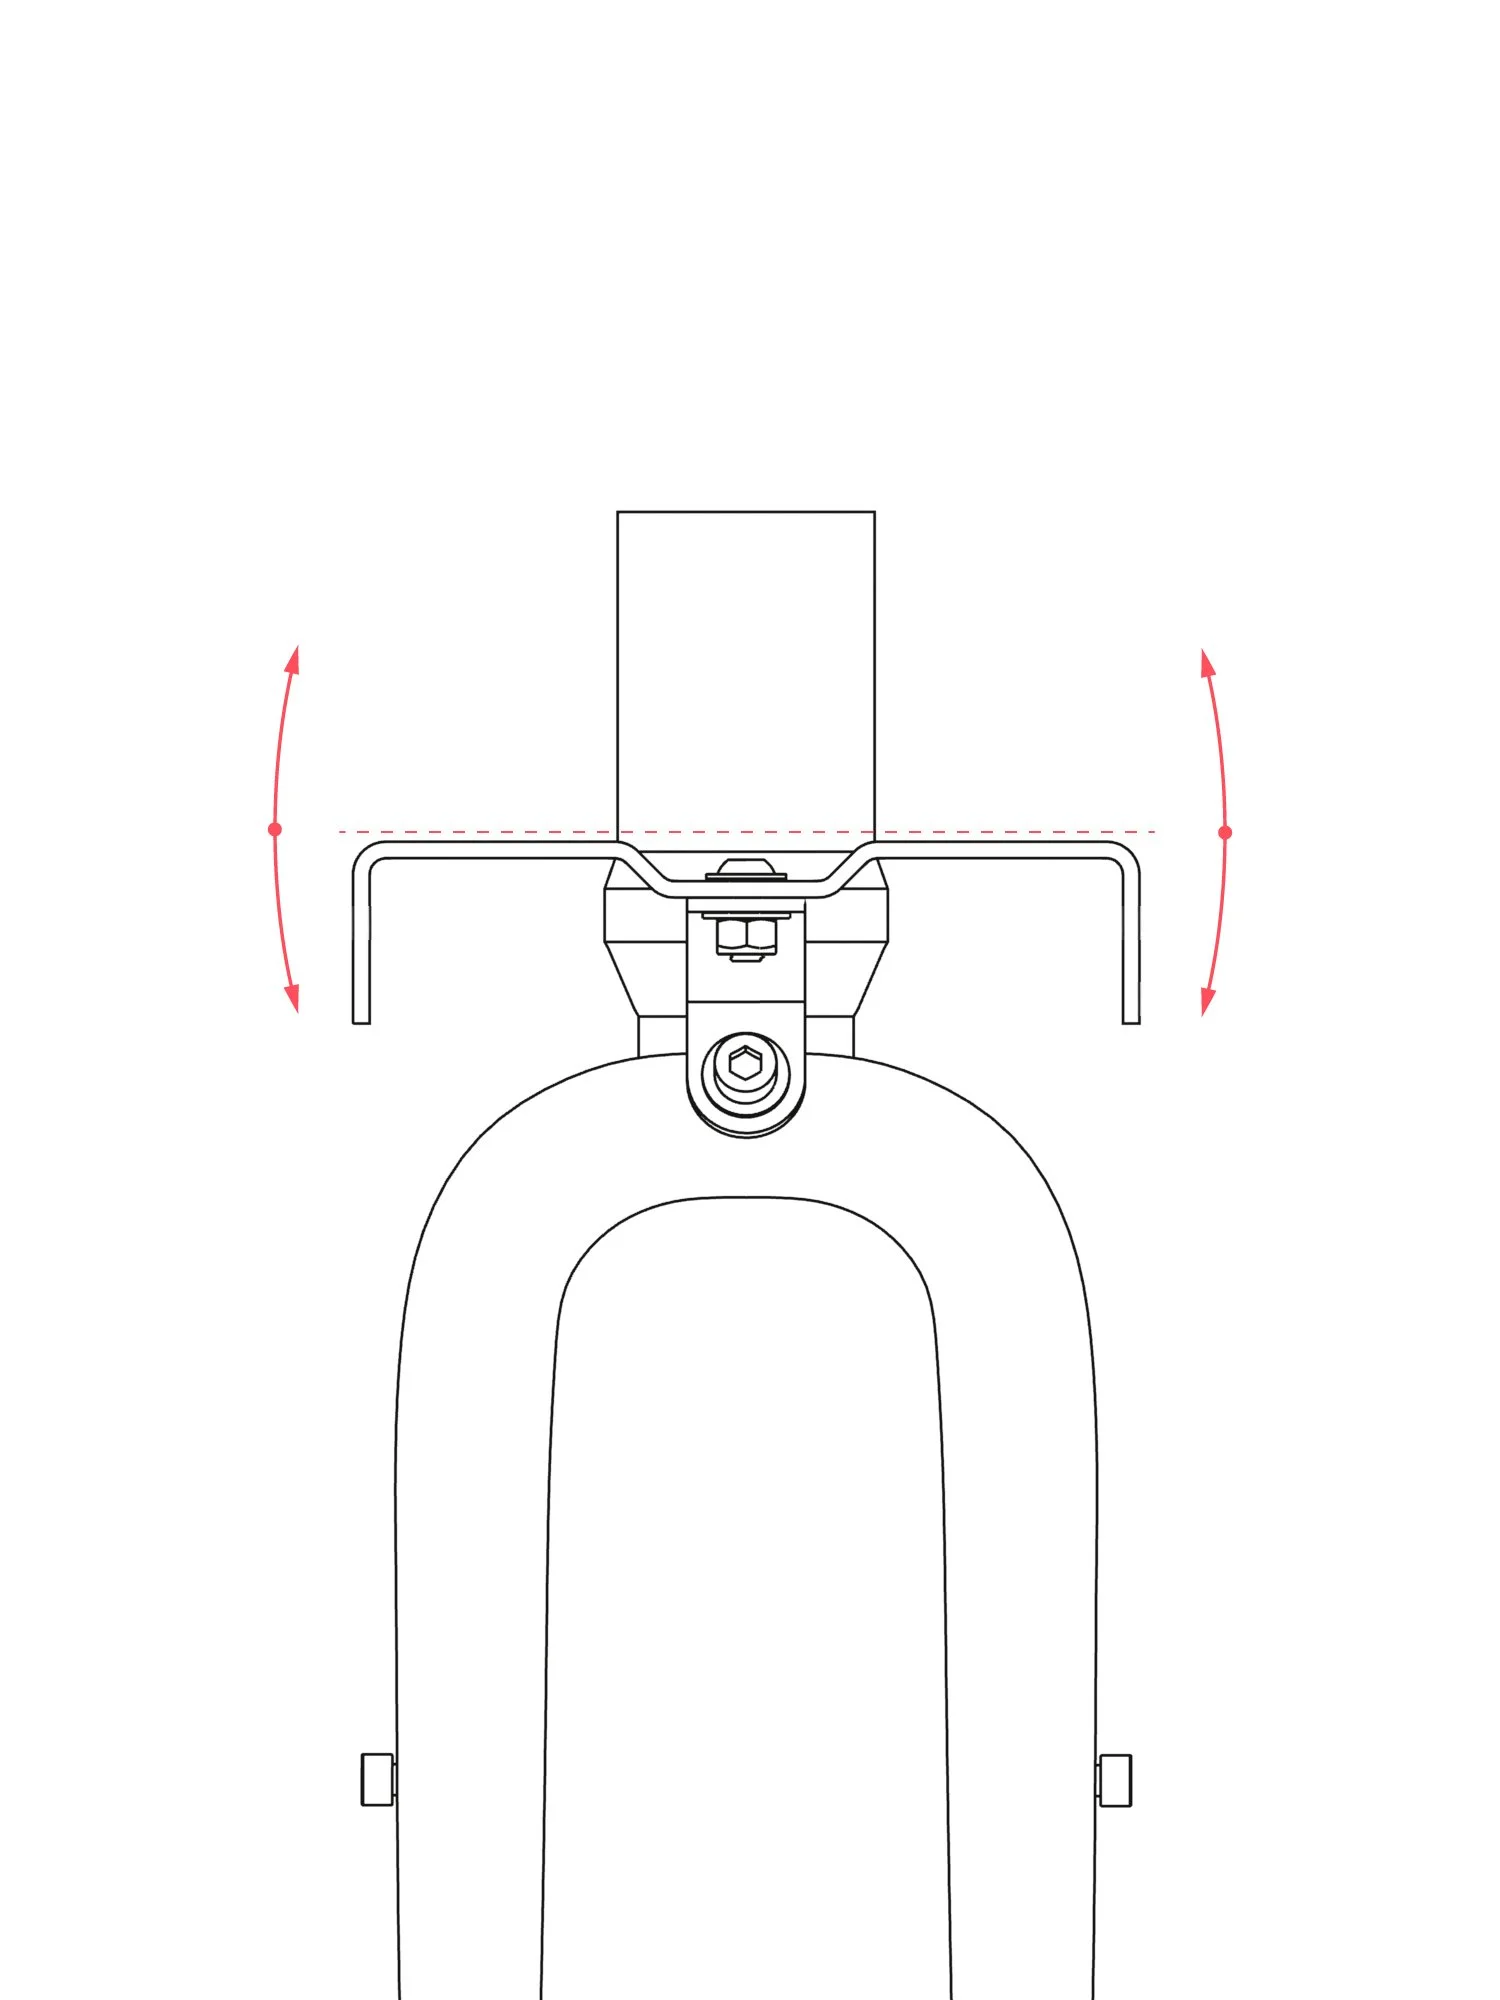
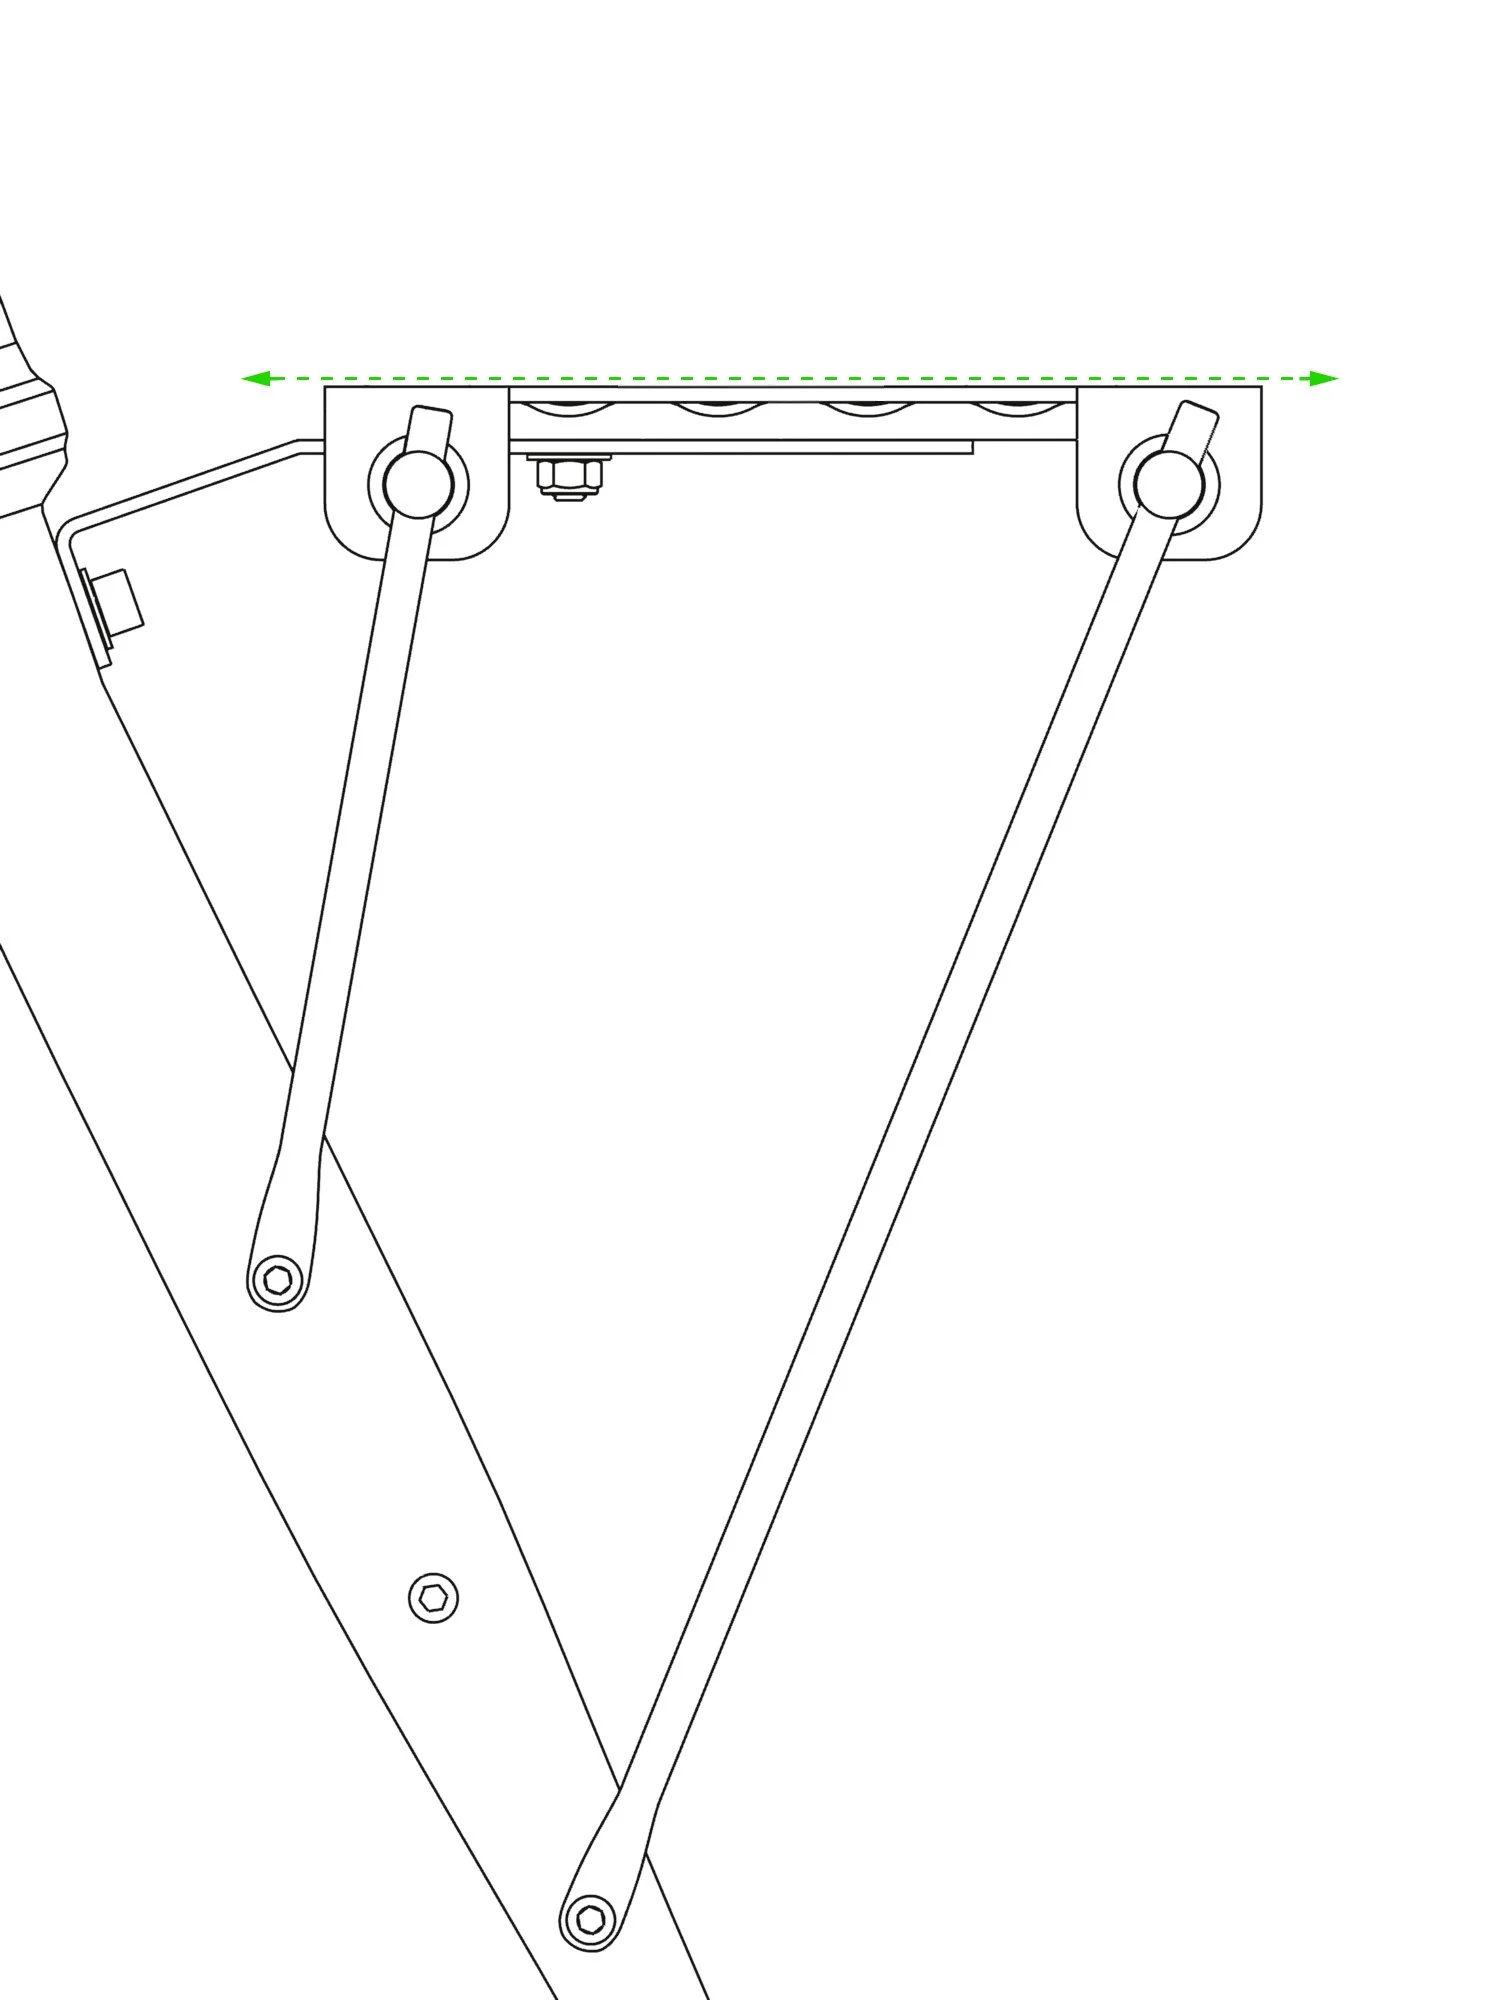
Step 4:
From the front, adjust the level of the base side-to-side.
Tighten the fork crown mounting bolt to hold this position.
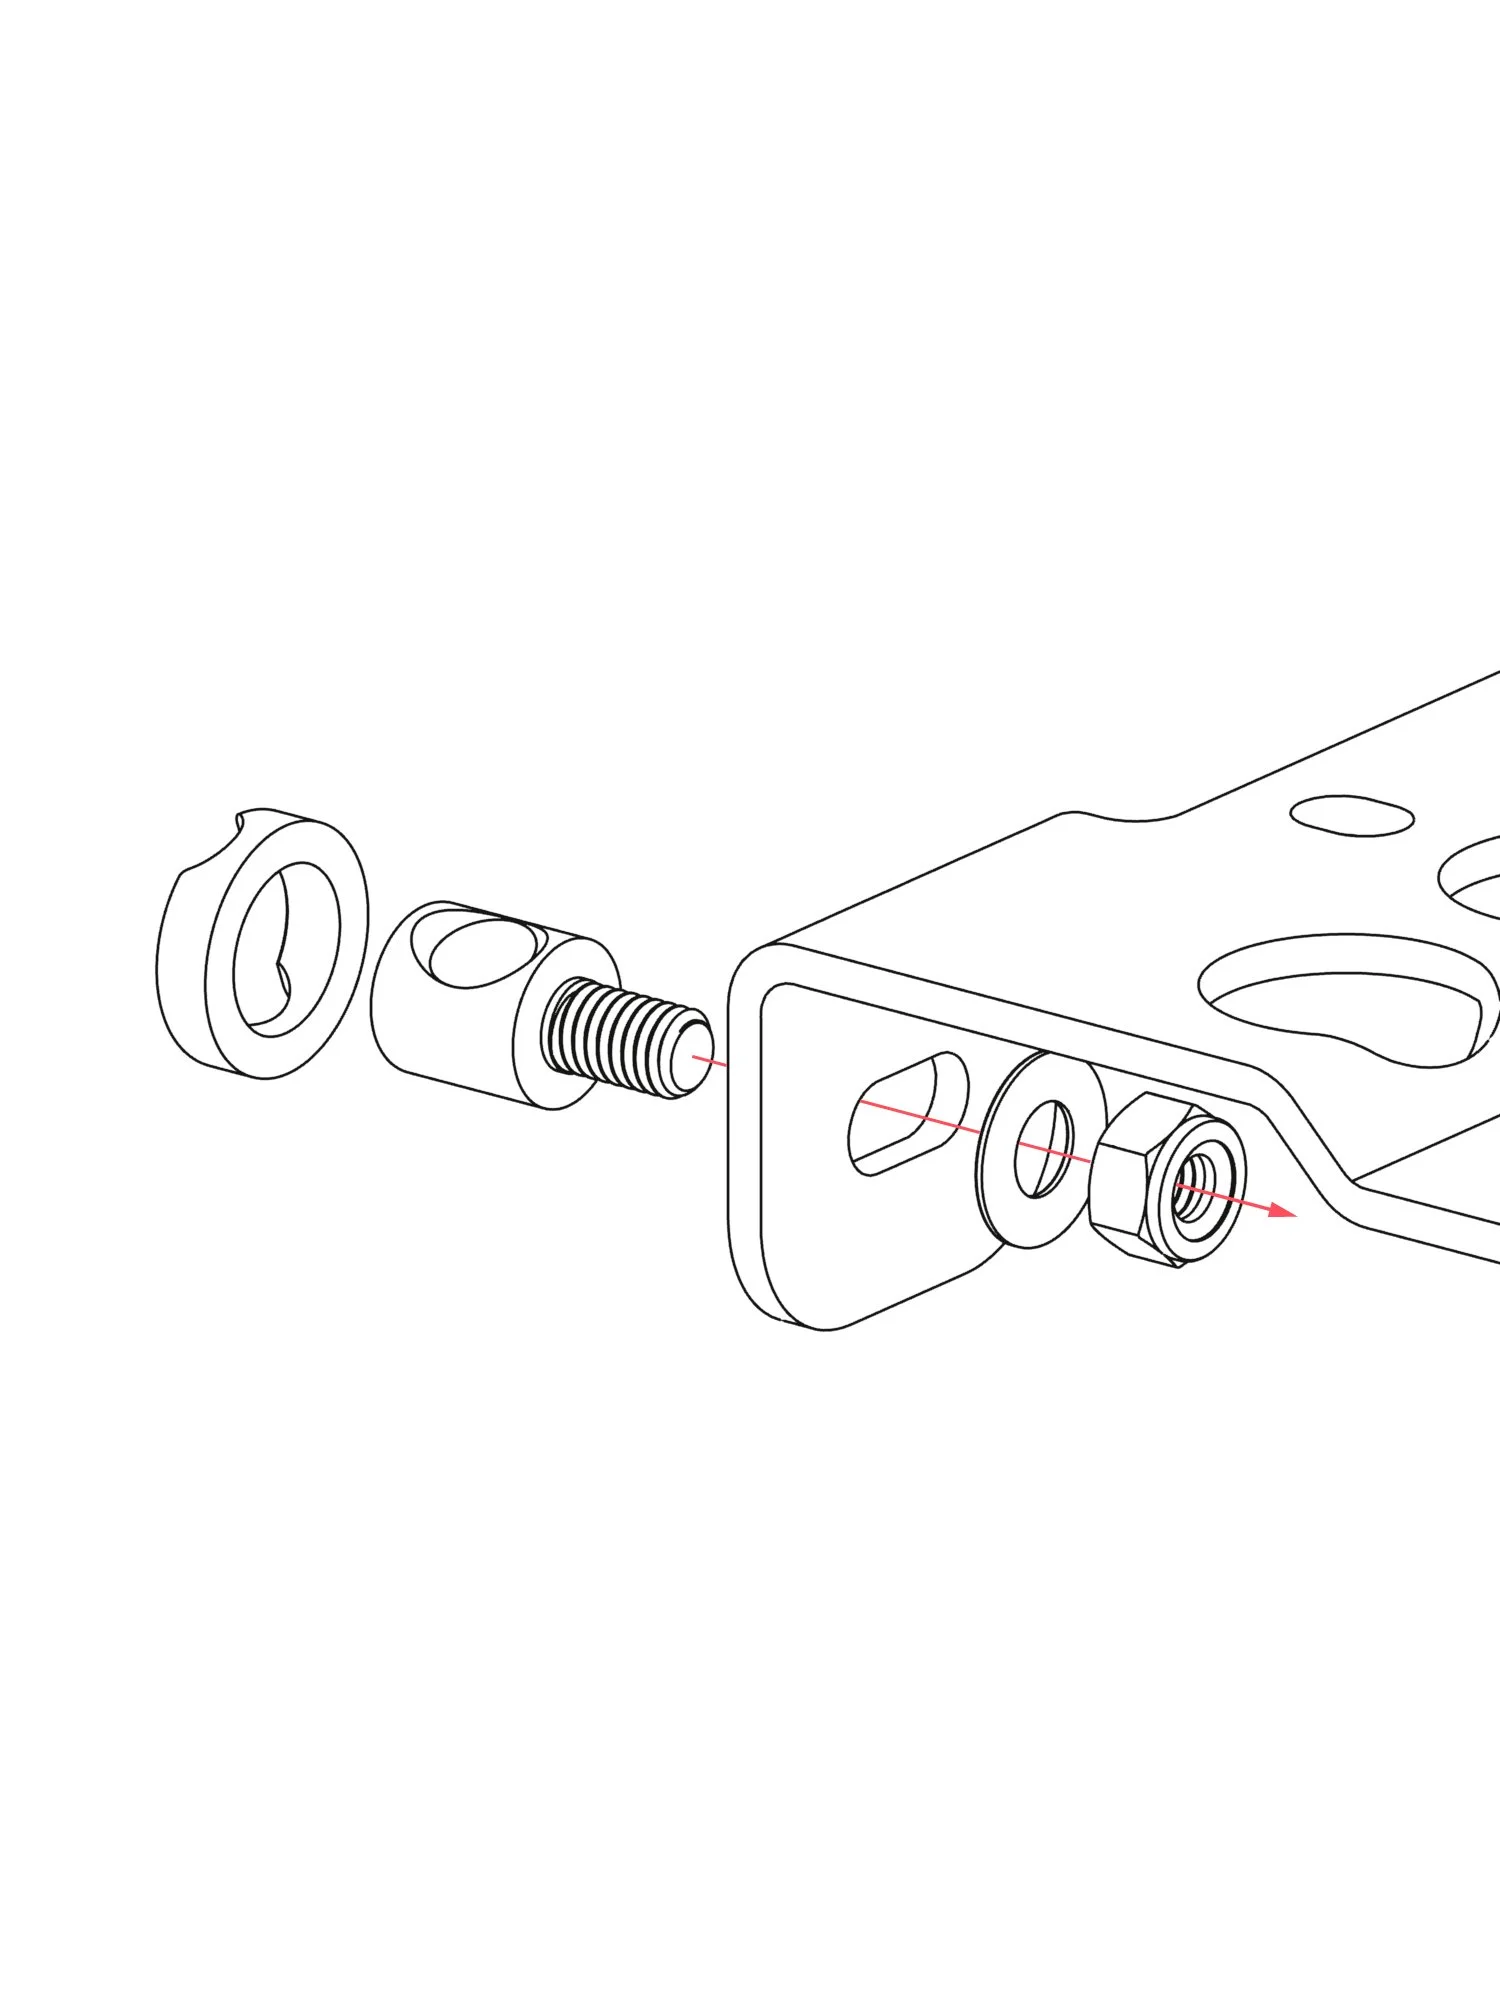
Step 5:
On the left or right side of the base, mount one of the daruma compression hardware to the front hole.
Lightly tighten to allow for adjustments on next steps.
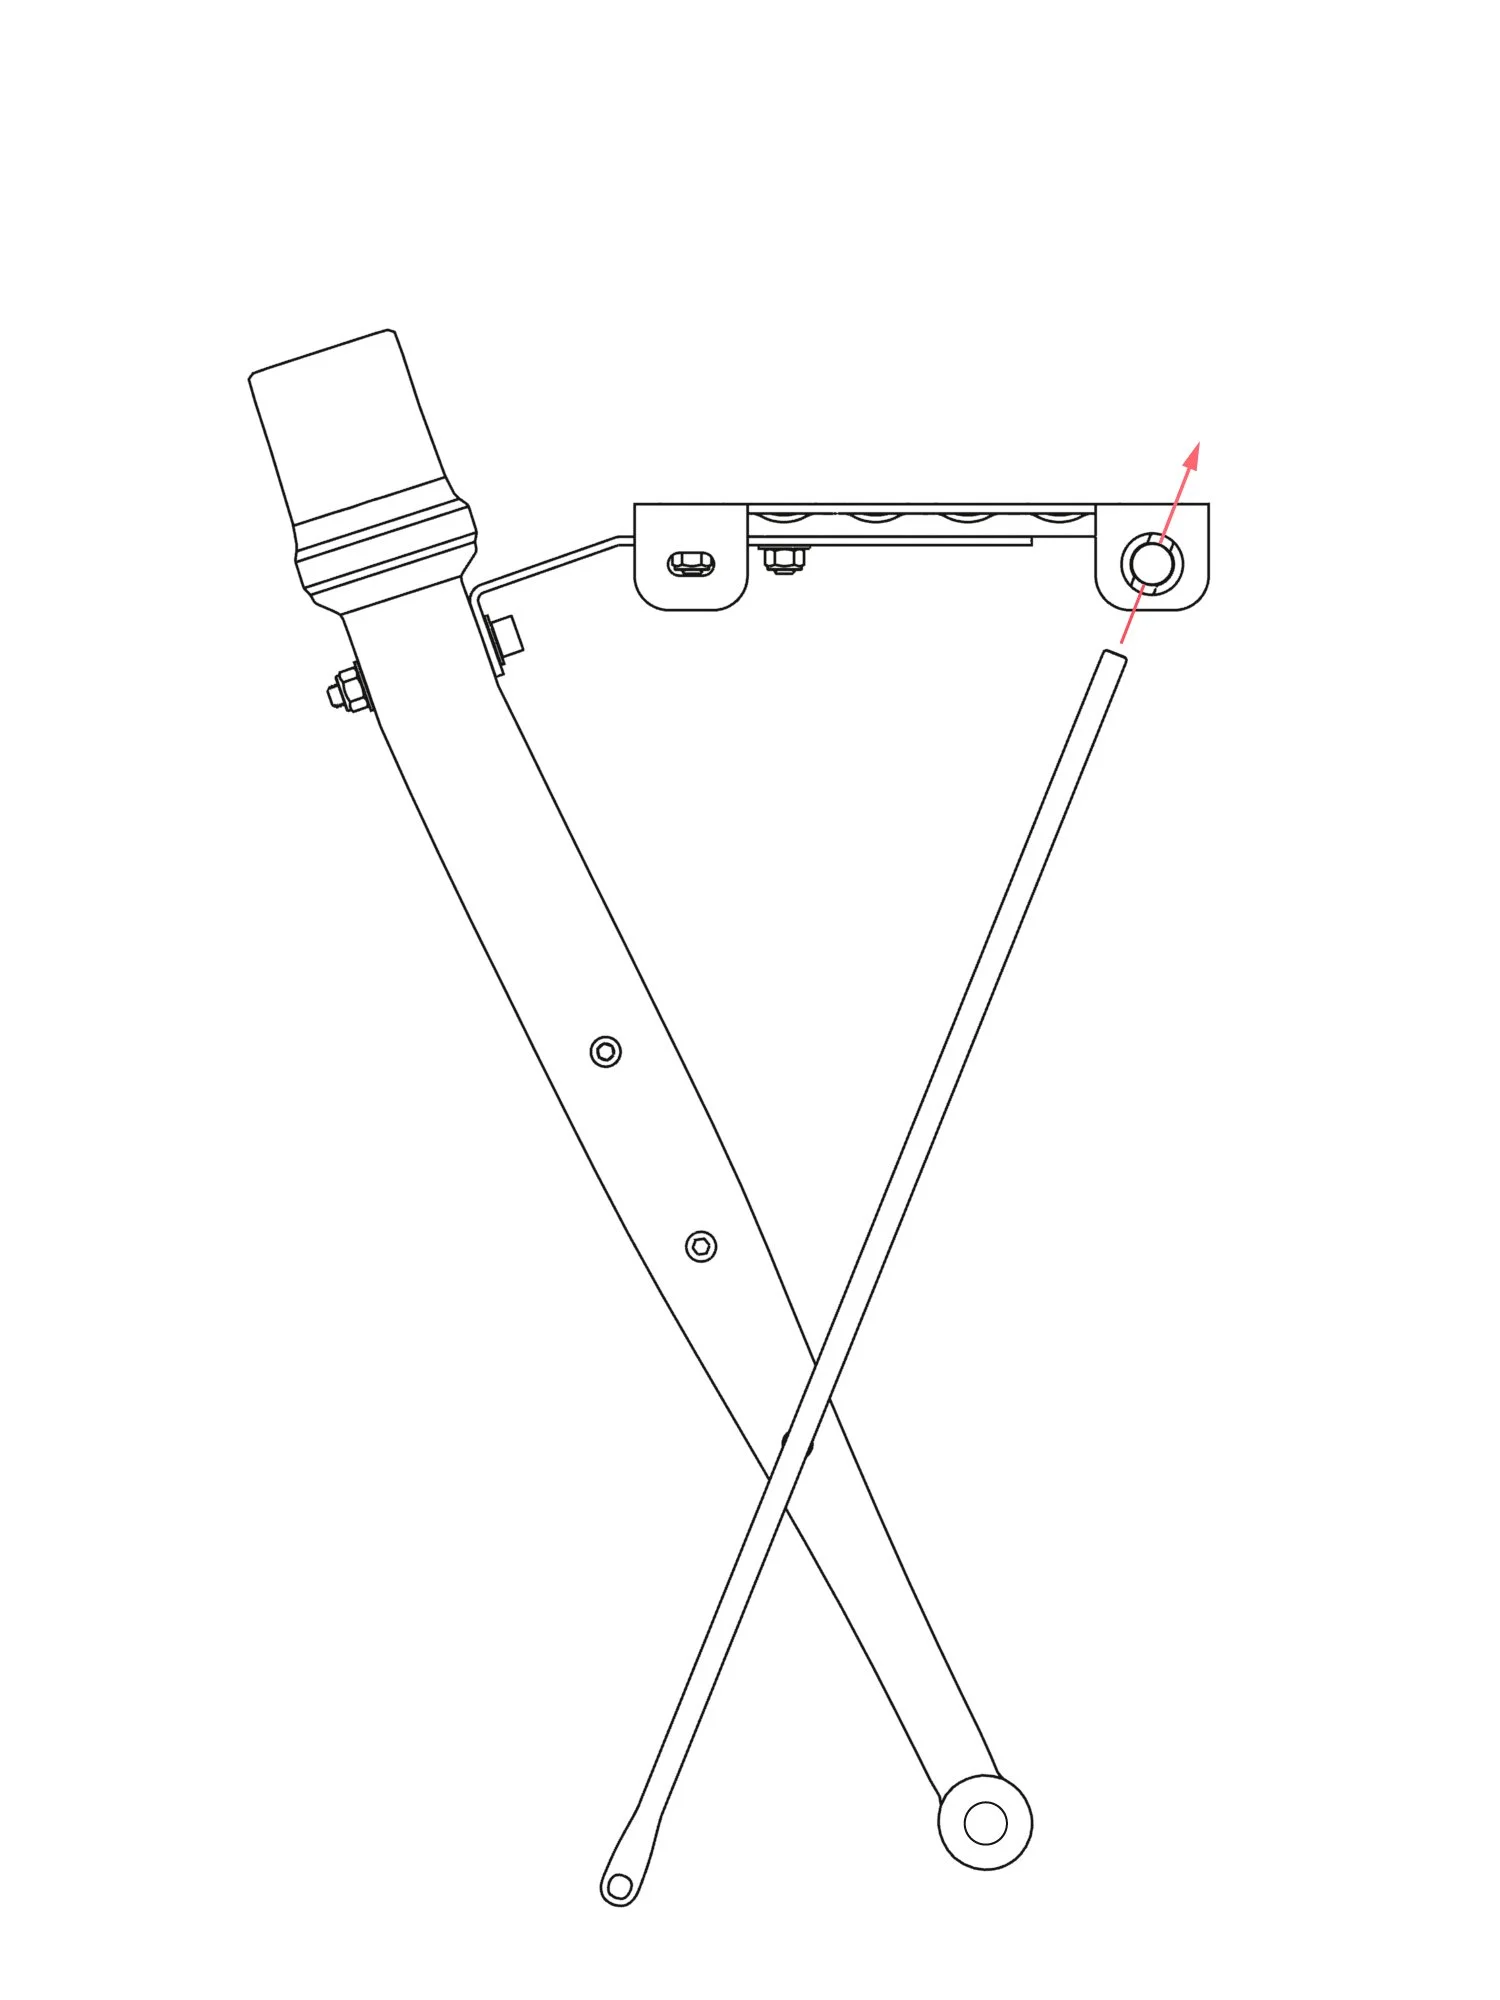
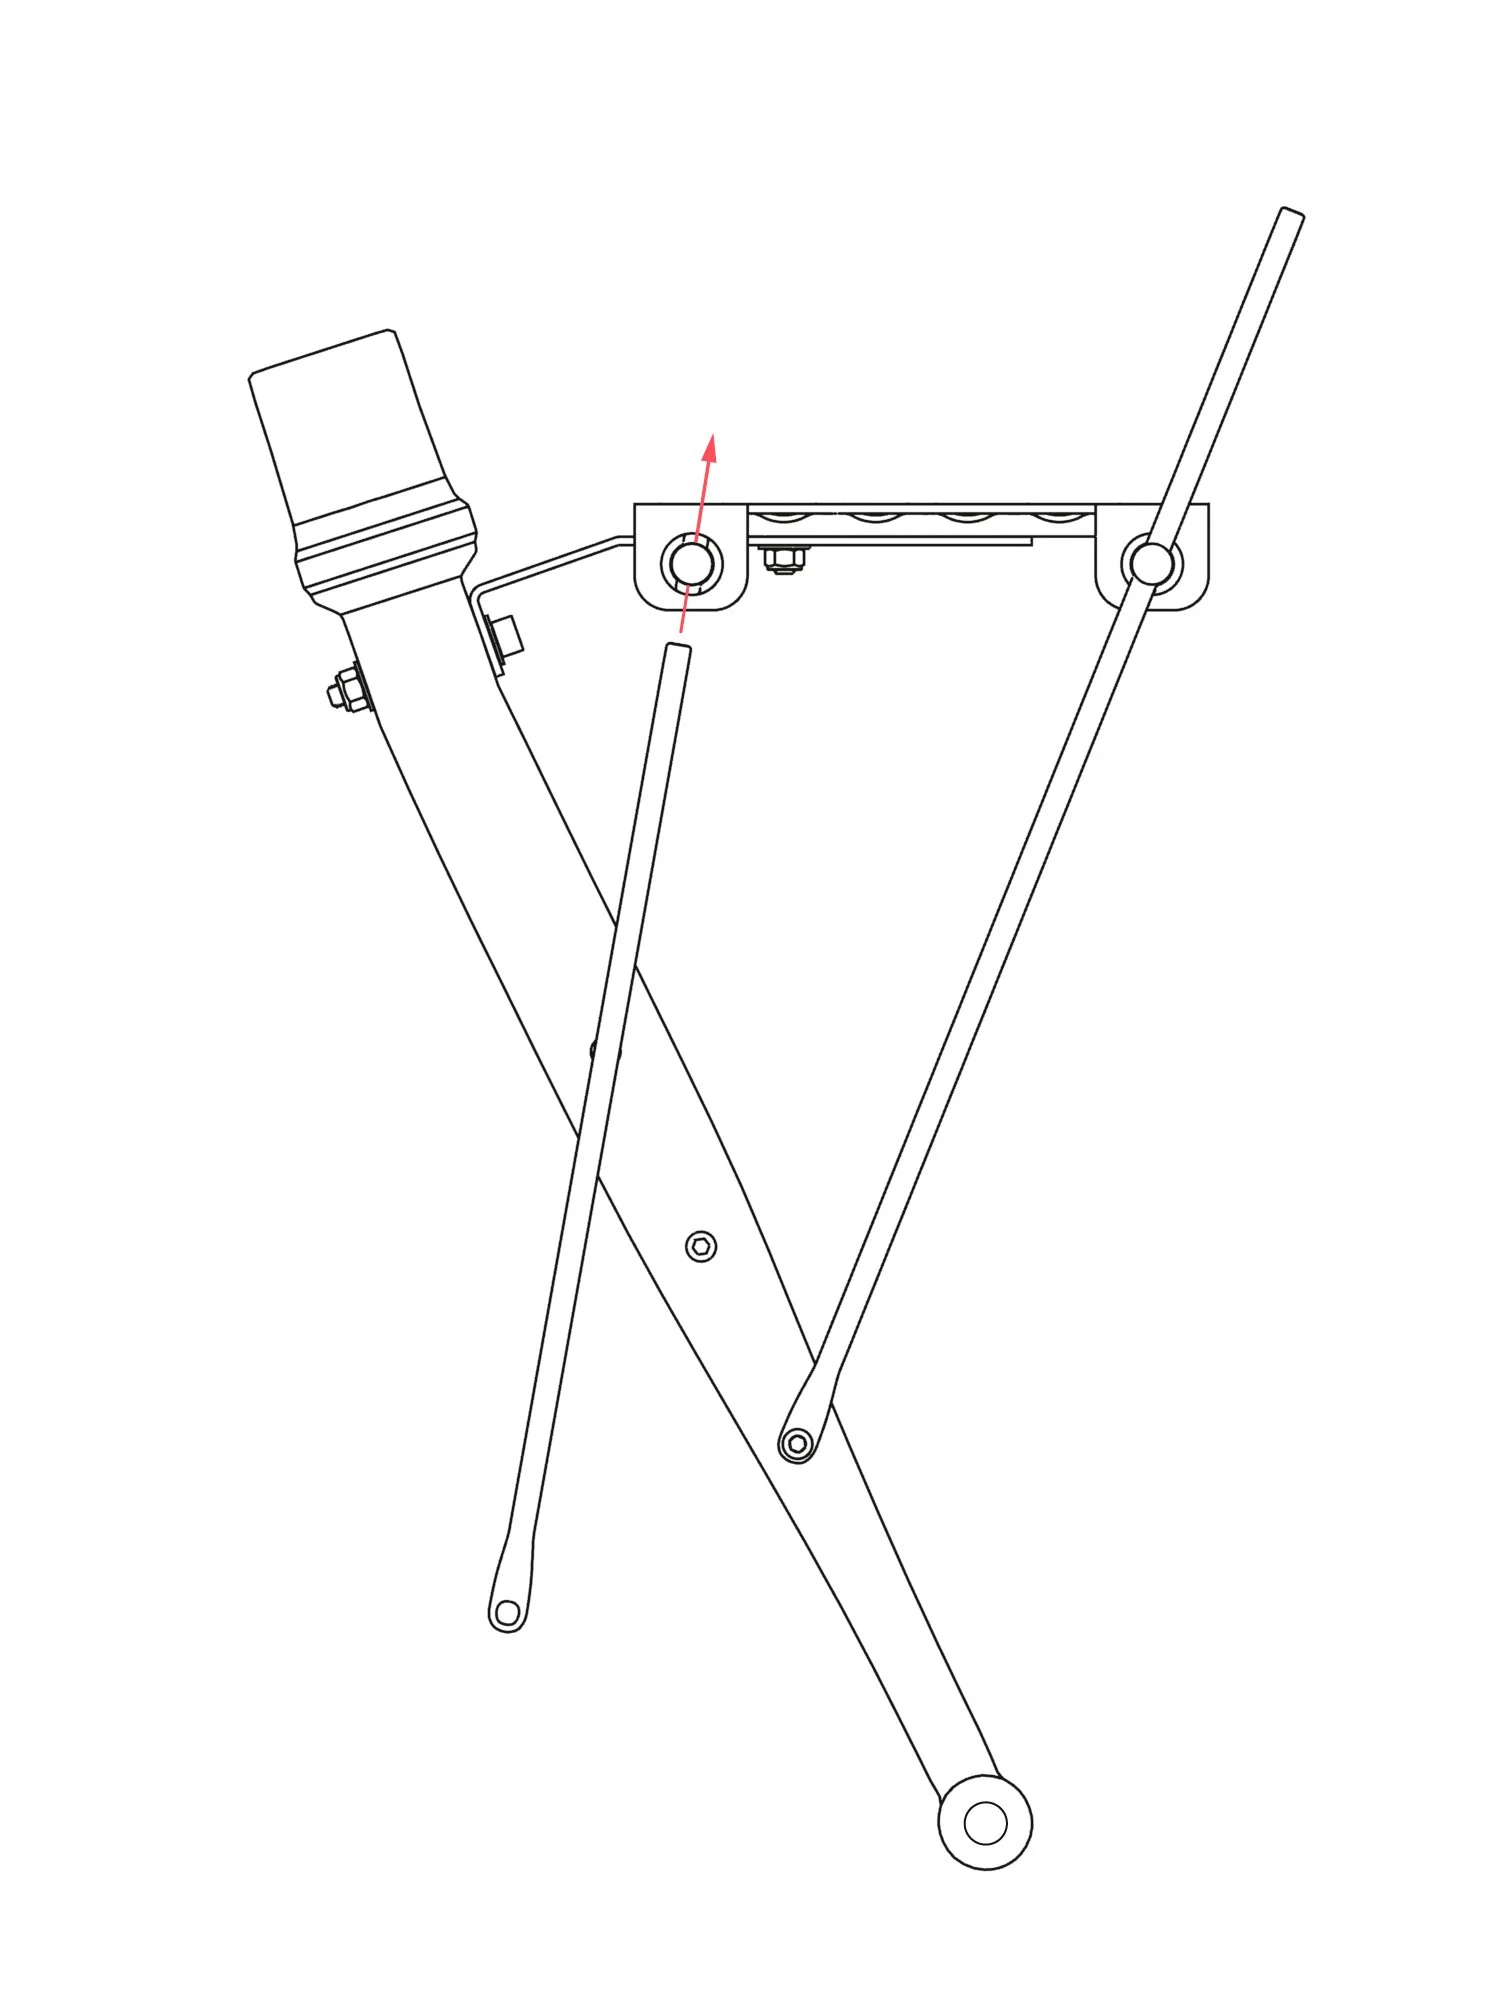
Step 6:
Choose mounting points for the support rods.
Your setup may be different than the images here.
If you have at least one threaded eyelet on the side of your fork, you will be able to mount both support rods.
Slide a support rod through the daruma hardware from the bottom.
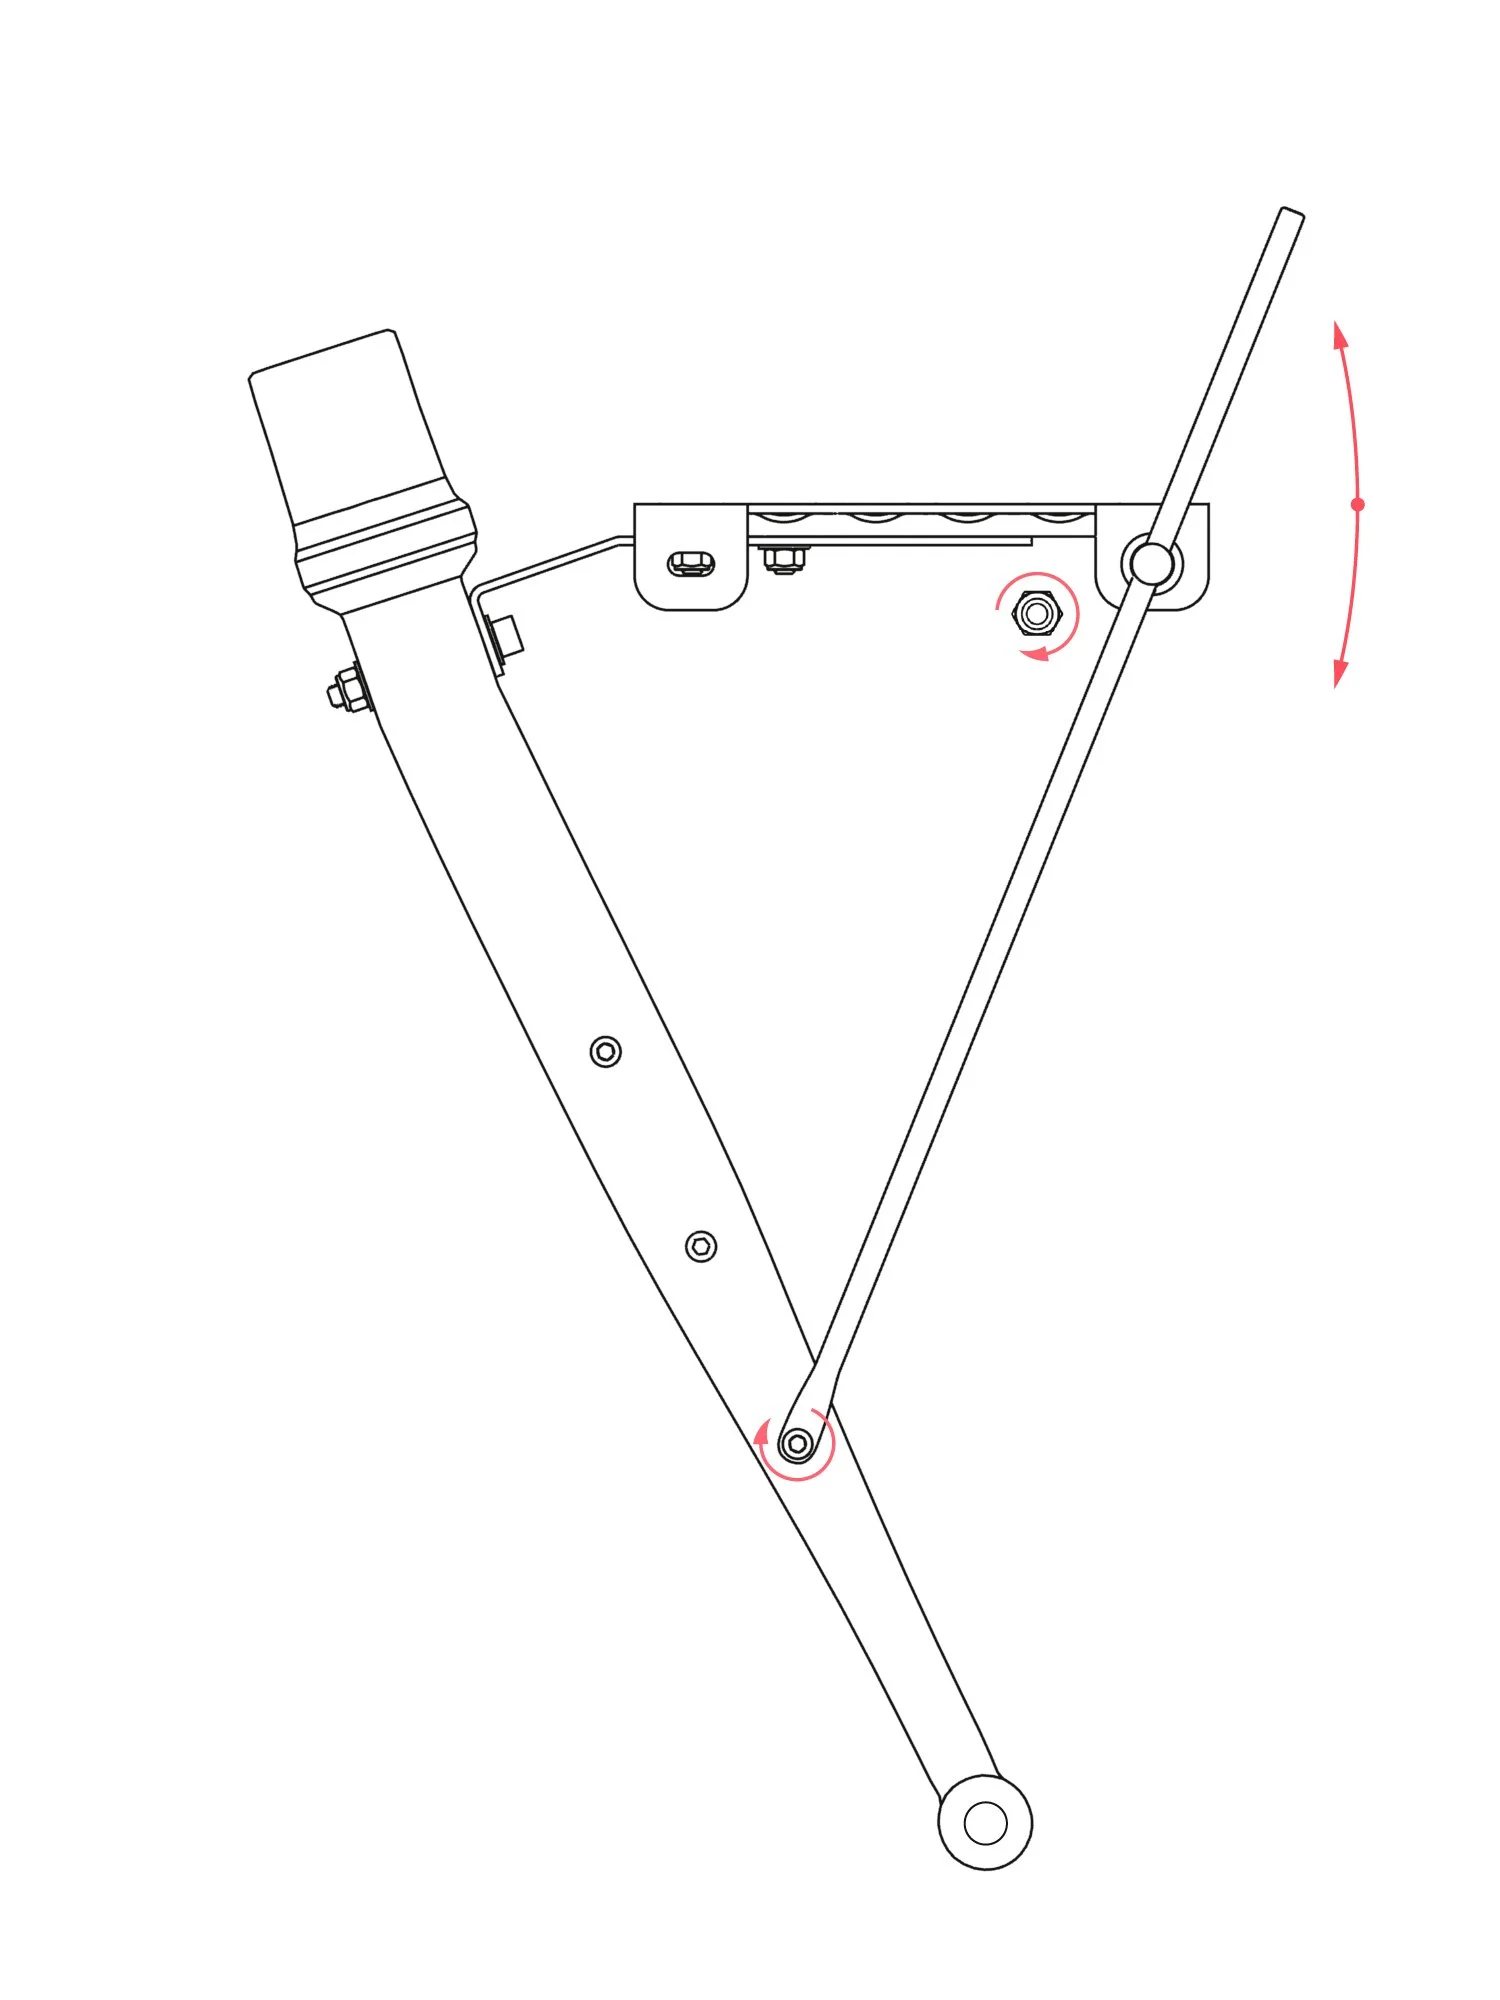
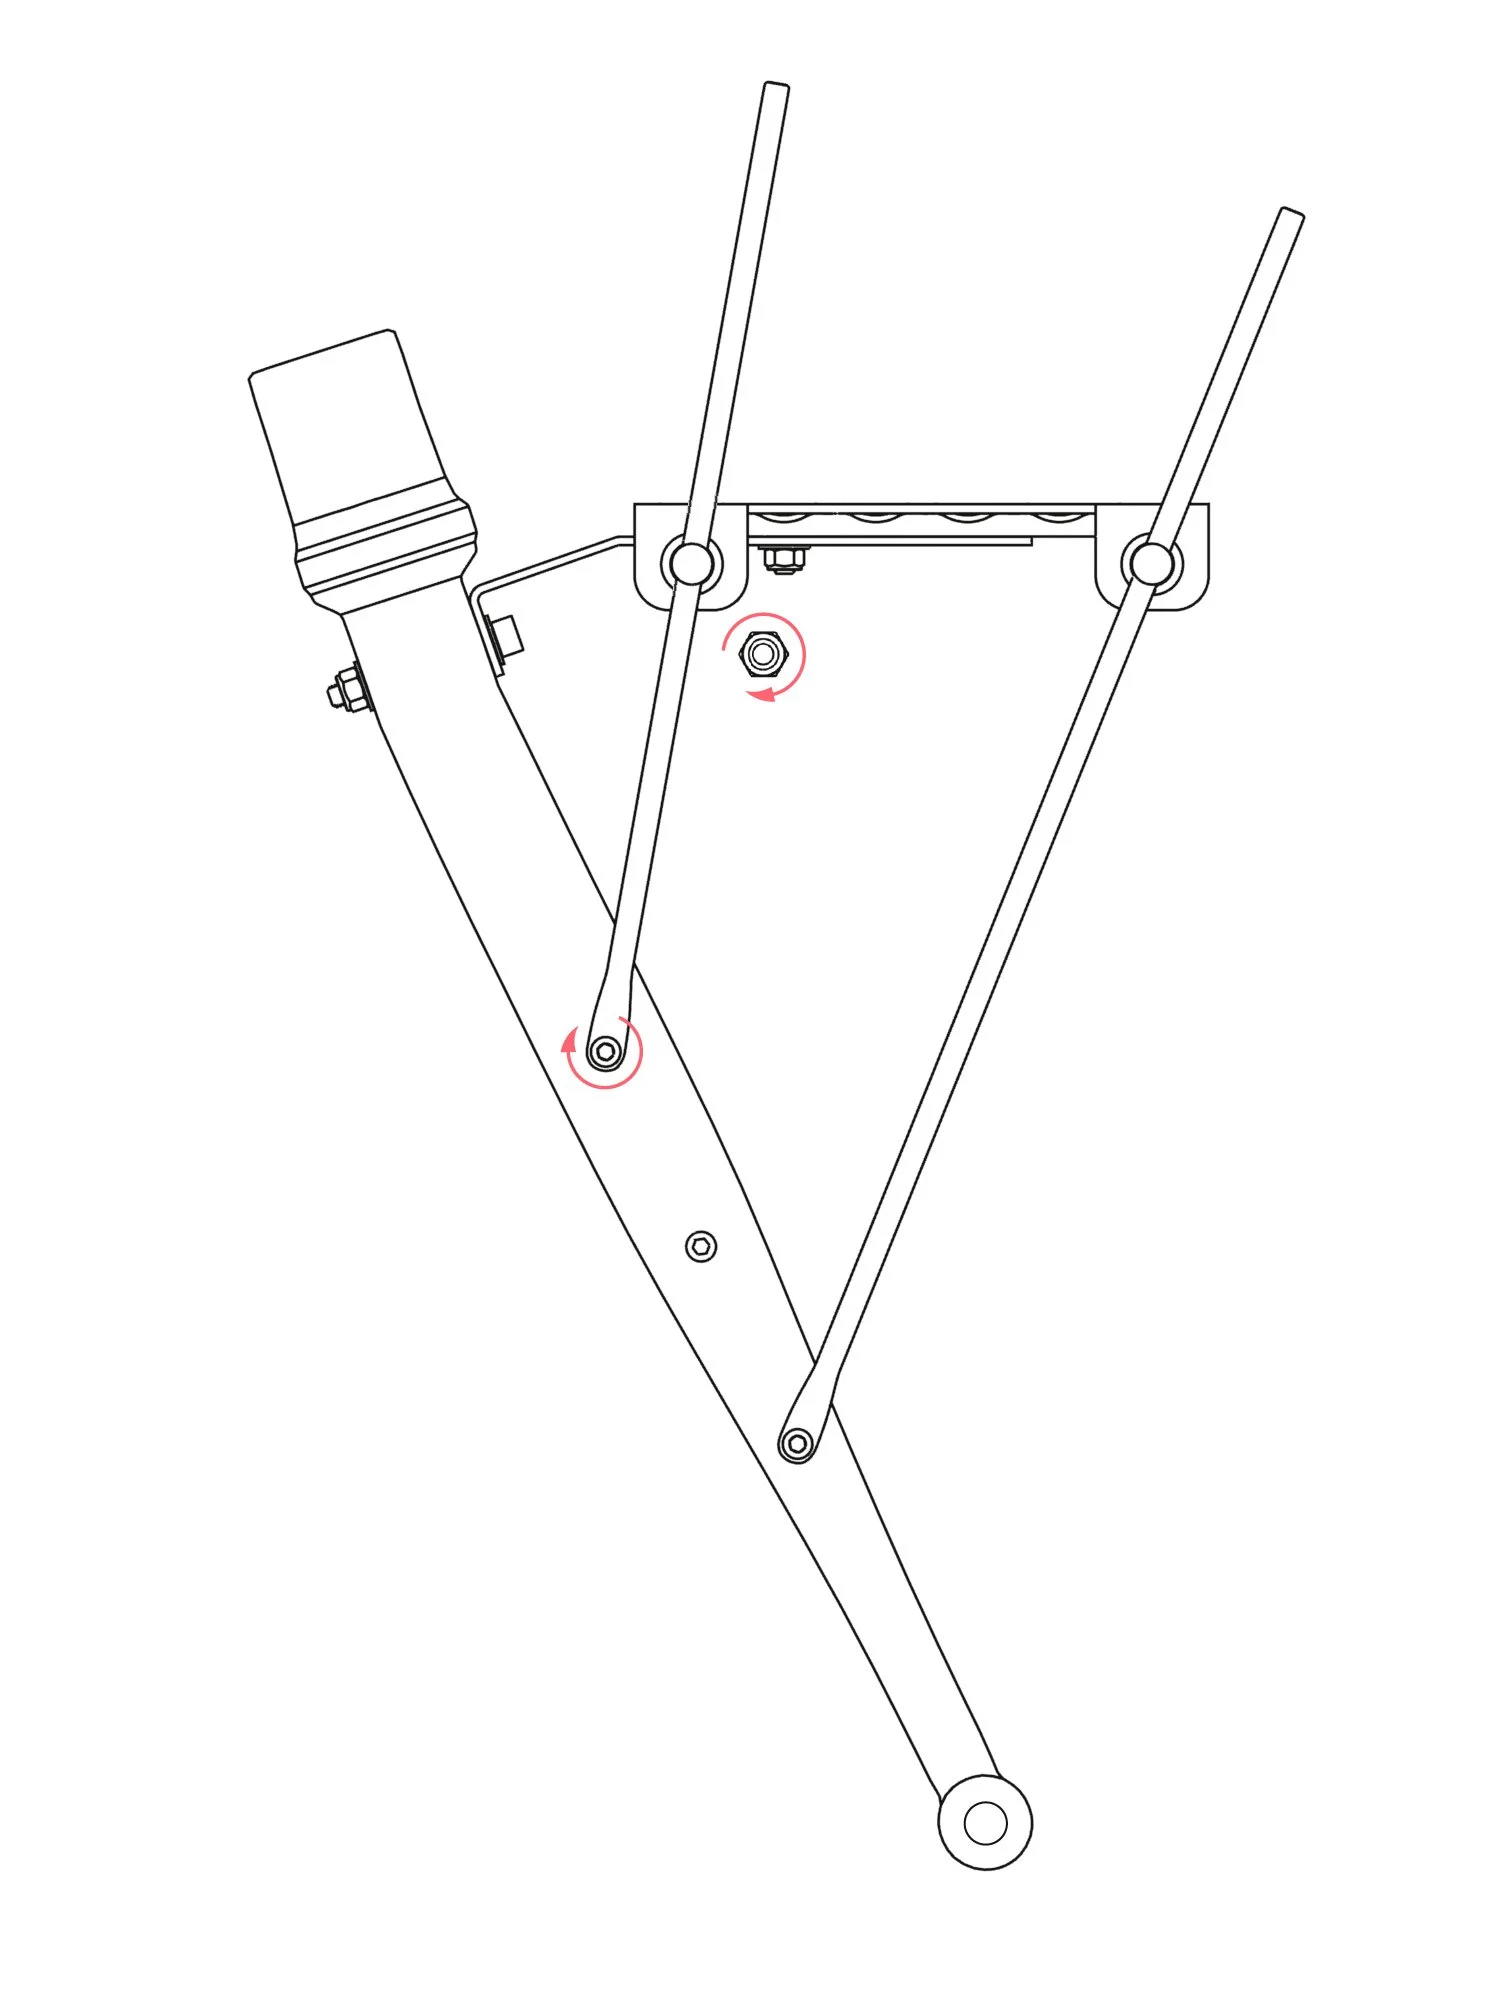
Step 7:
Slide the rod up until the mounting hole at the bottom lines up with your fork eyelet.
Ensure that the fork eyelet threads are clean and apply a small amount of grease to an M5 bolt. Lightly tighten the M5 bolt and the nut on the inside of the daruma hardware.
Repeat steps on the opposite side. Adjust the level of the base if needed.
Step 8:
Repeat the process for the inside support rods.
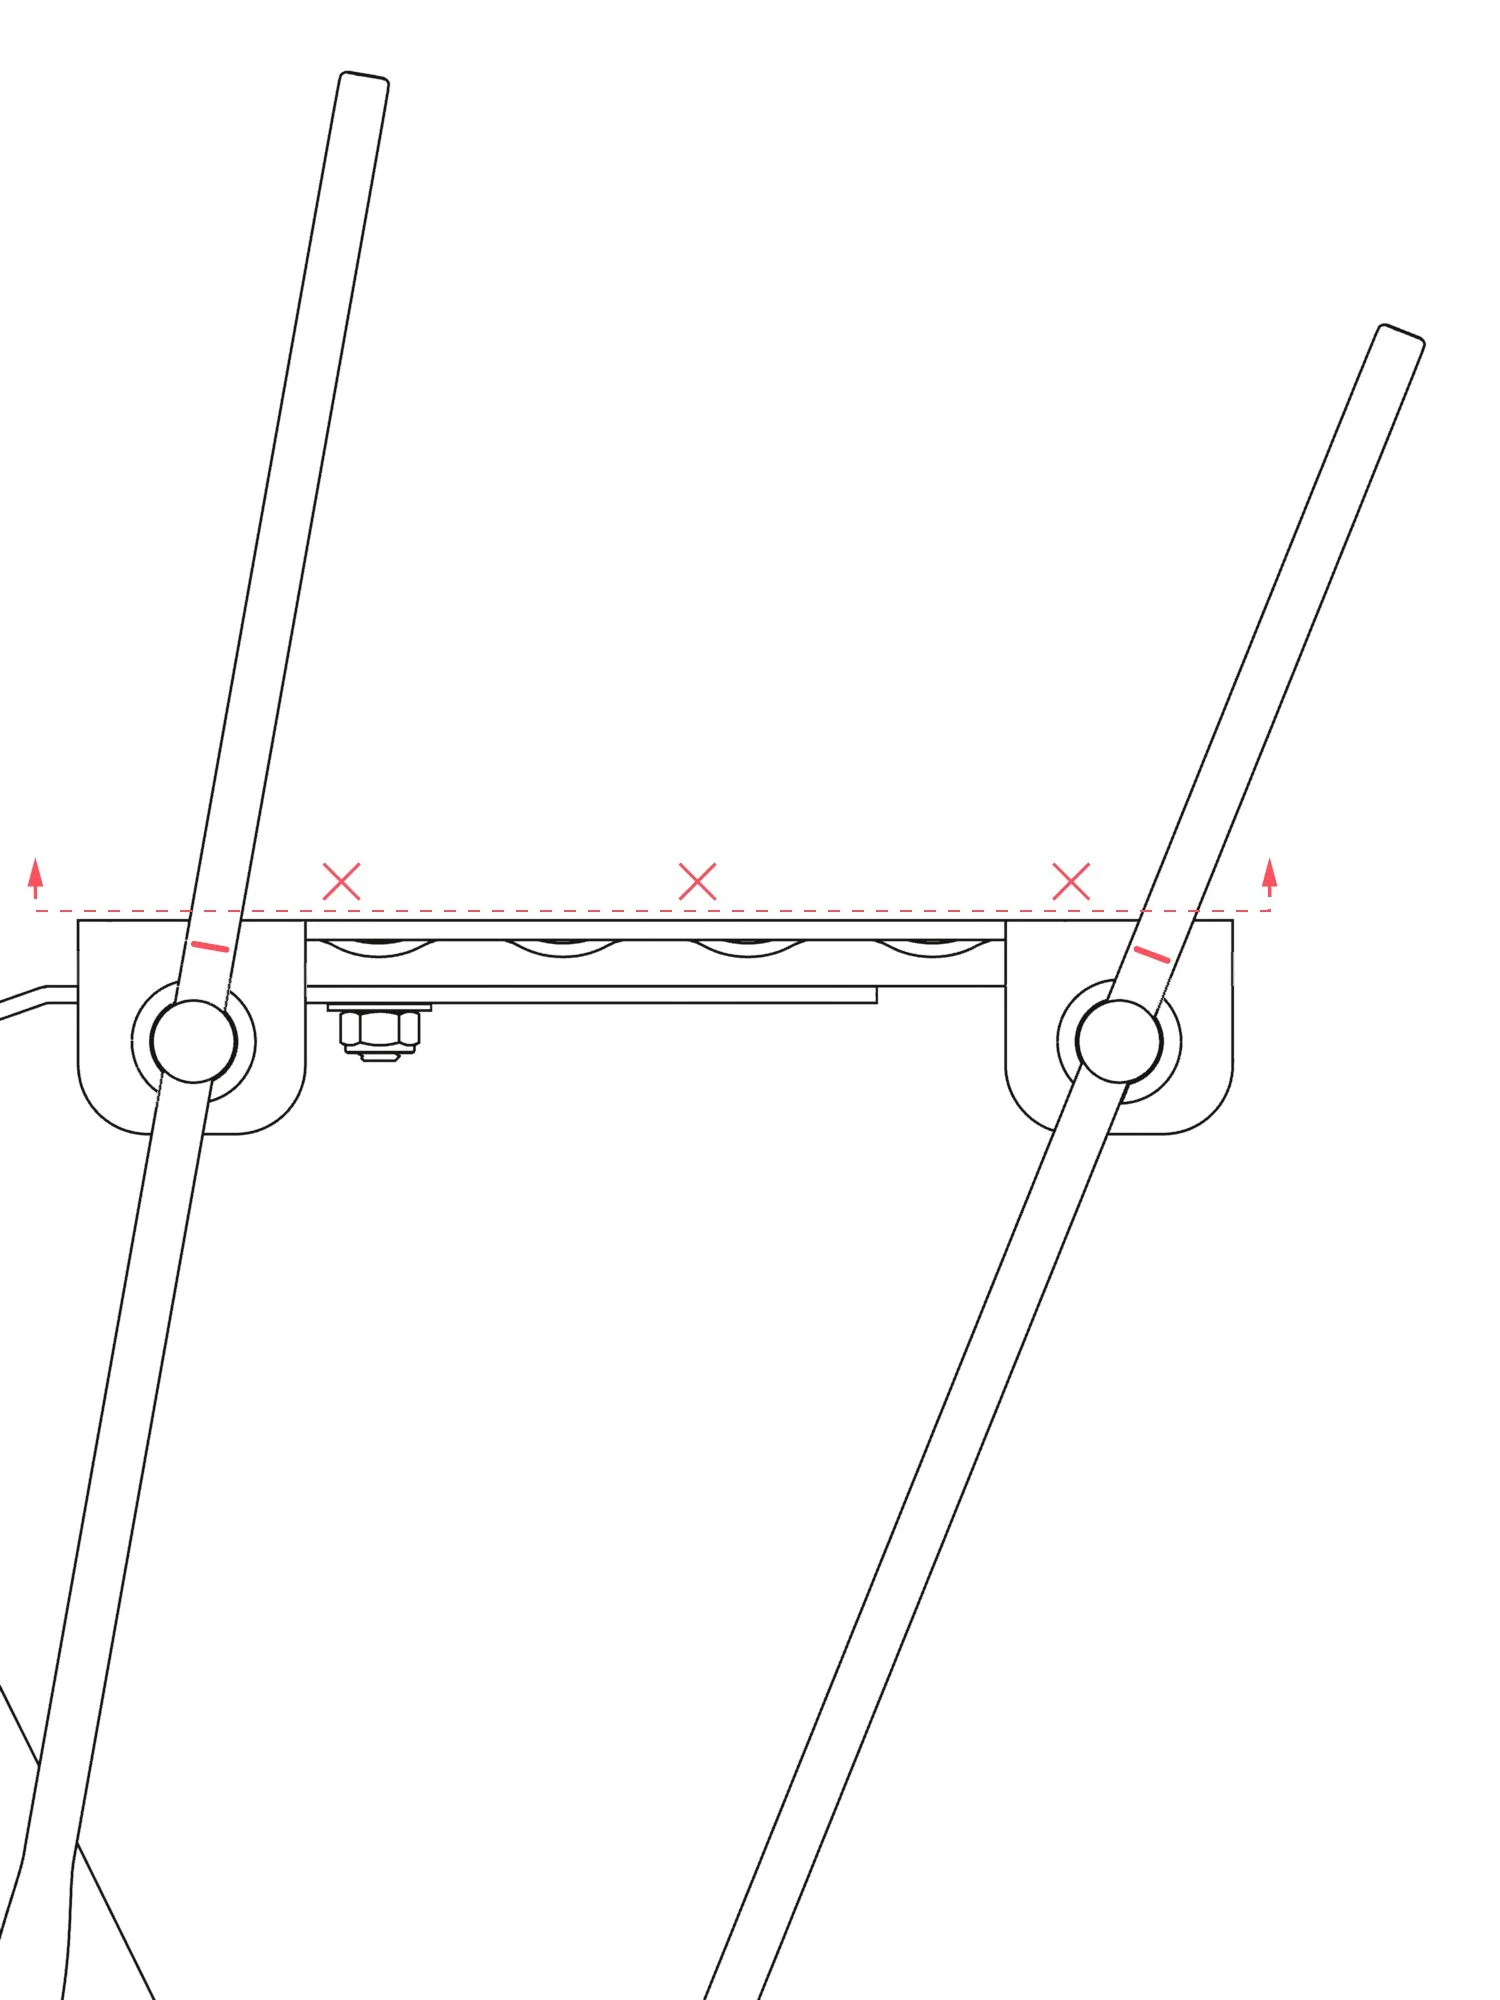
Step 9:
Mark the rods where they will be cut to length.
It is important that the rods are cut so that they do not extend above the top surface of the base.
Double check your cutting marks and the final position of the base.
Step 10:
Remove the rods one at a time and cut them to length, re-installing after cutting. This will help keep the base in the desired position.
Double check your measurements before cutting. Clean up the ends of the rods with sandpaper or a file.
Re-install the rods to the correct position and tighten the hardware.
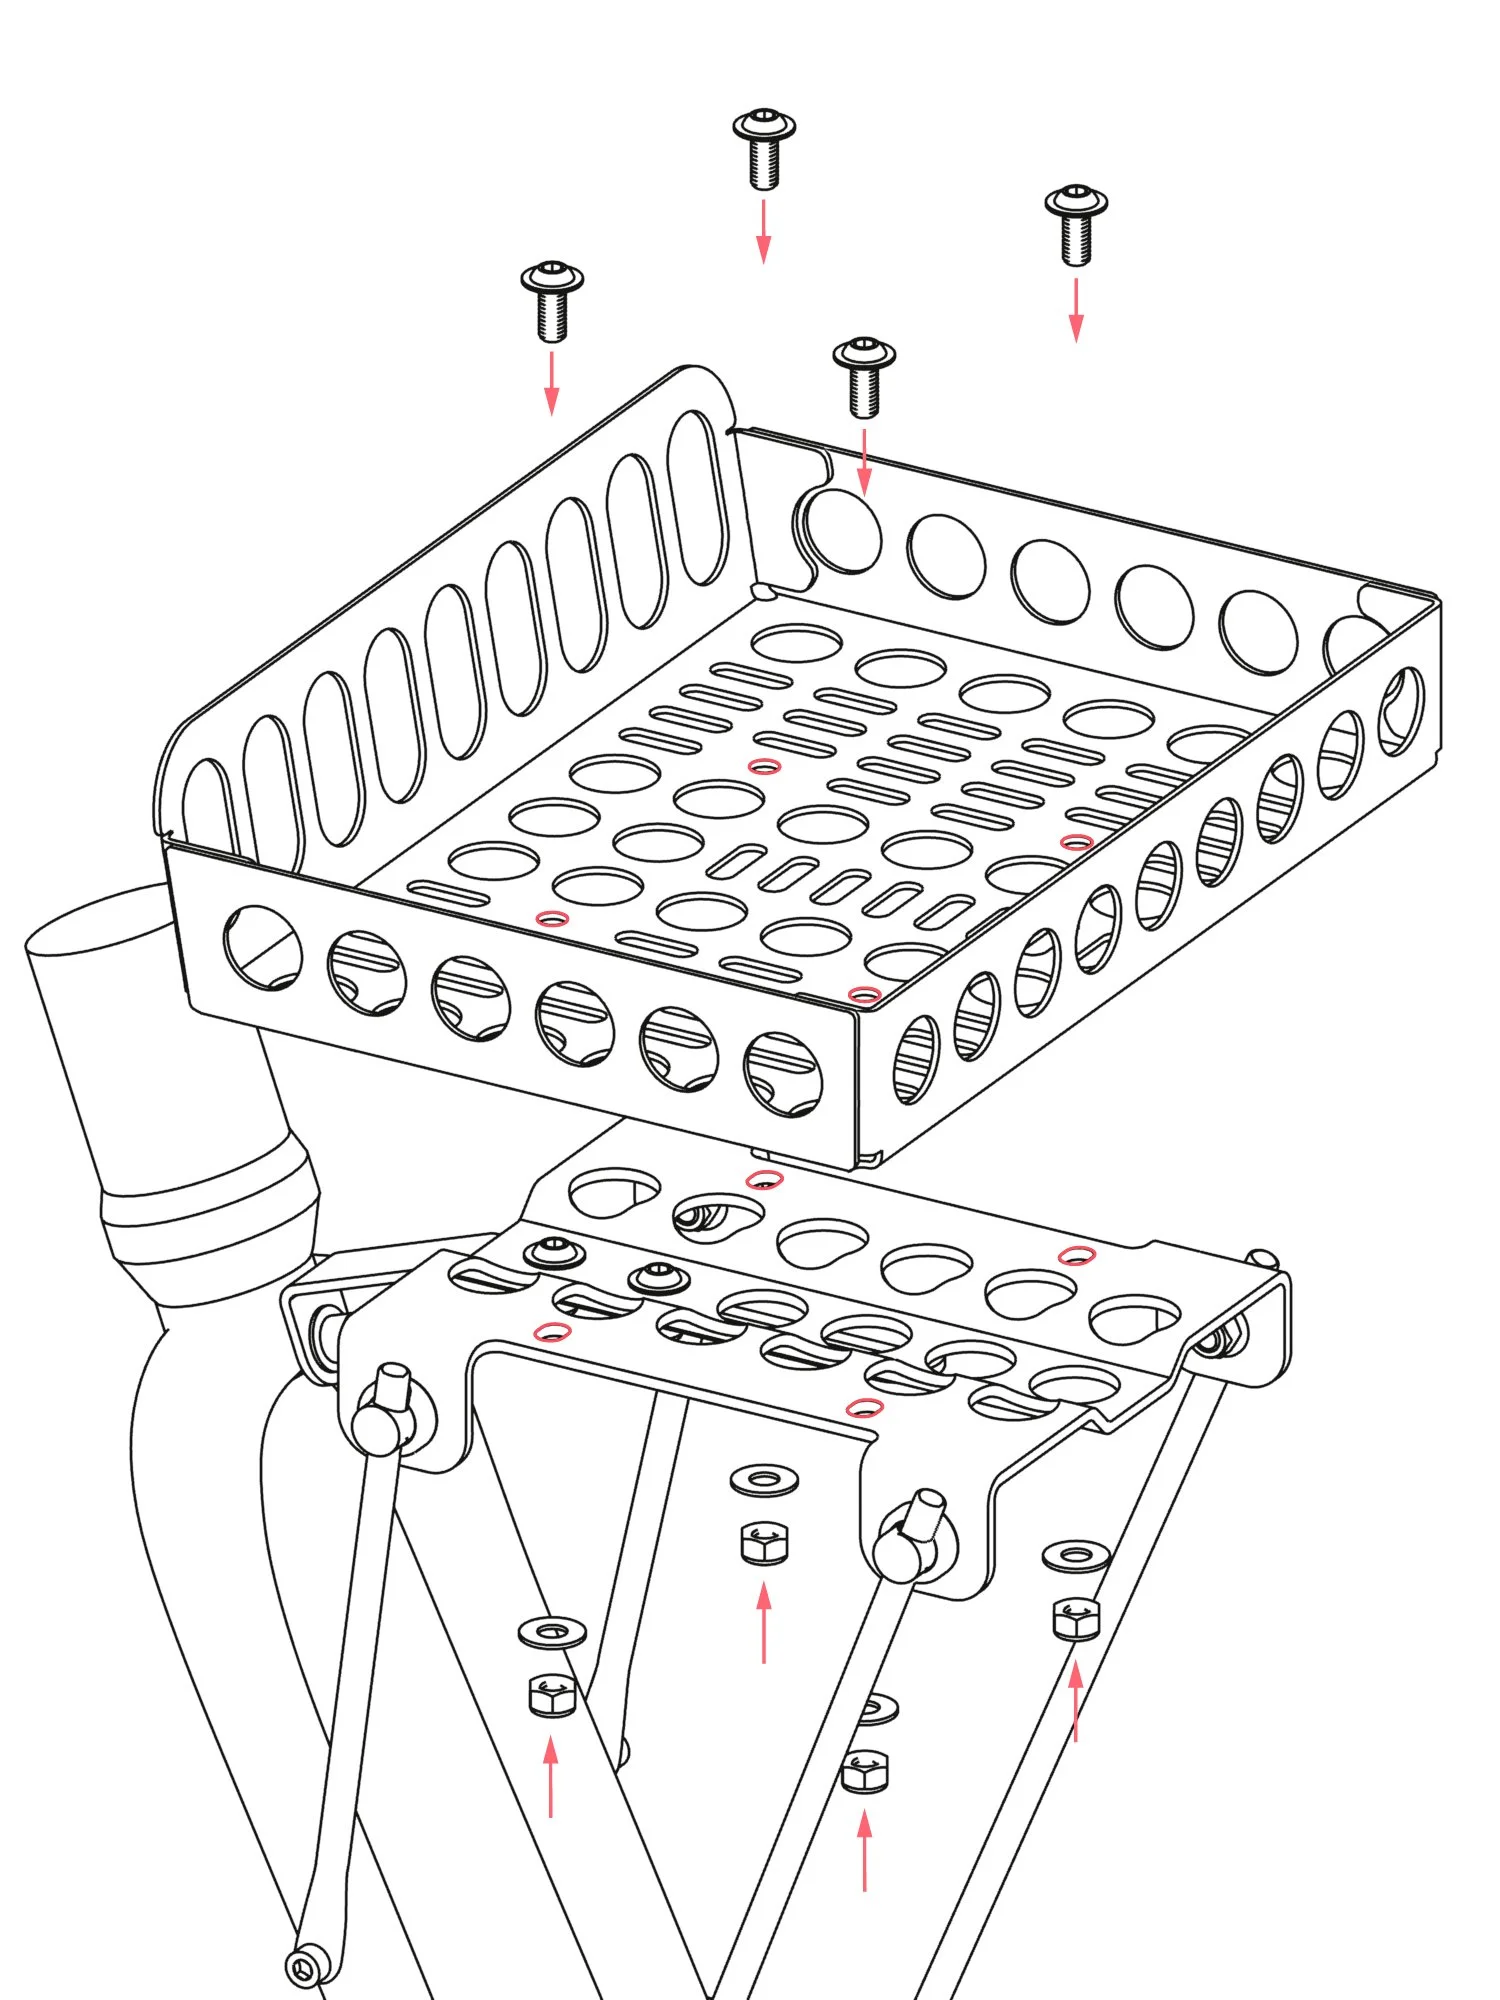
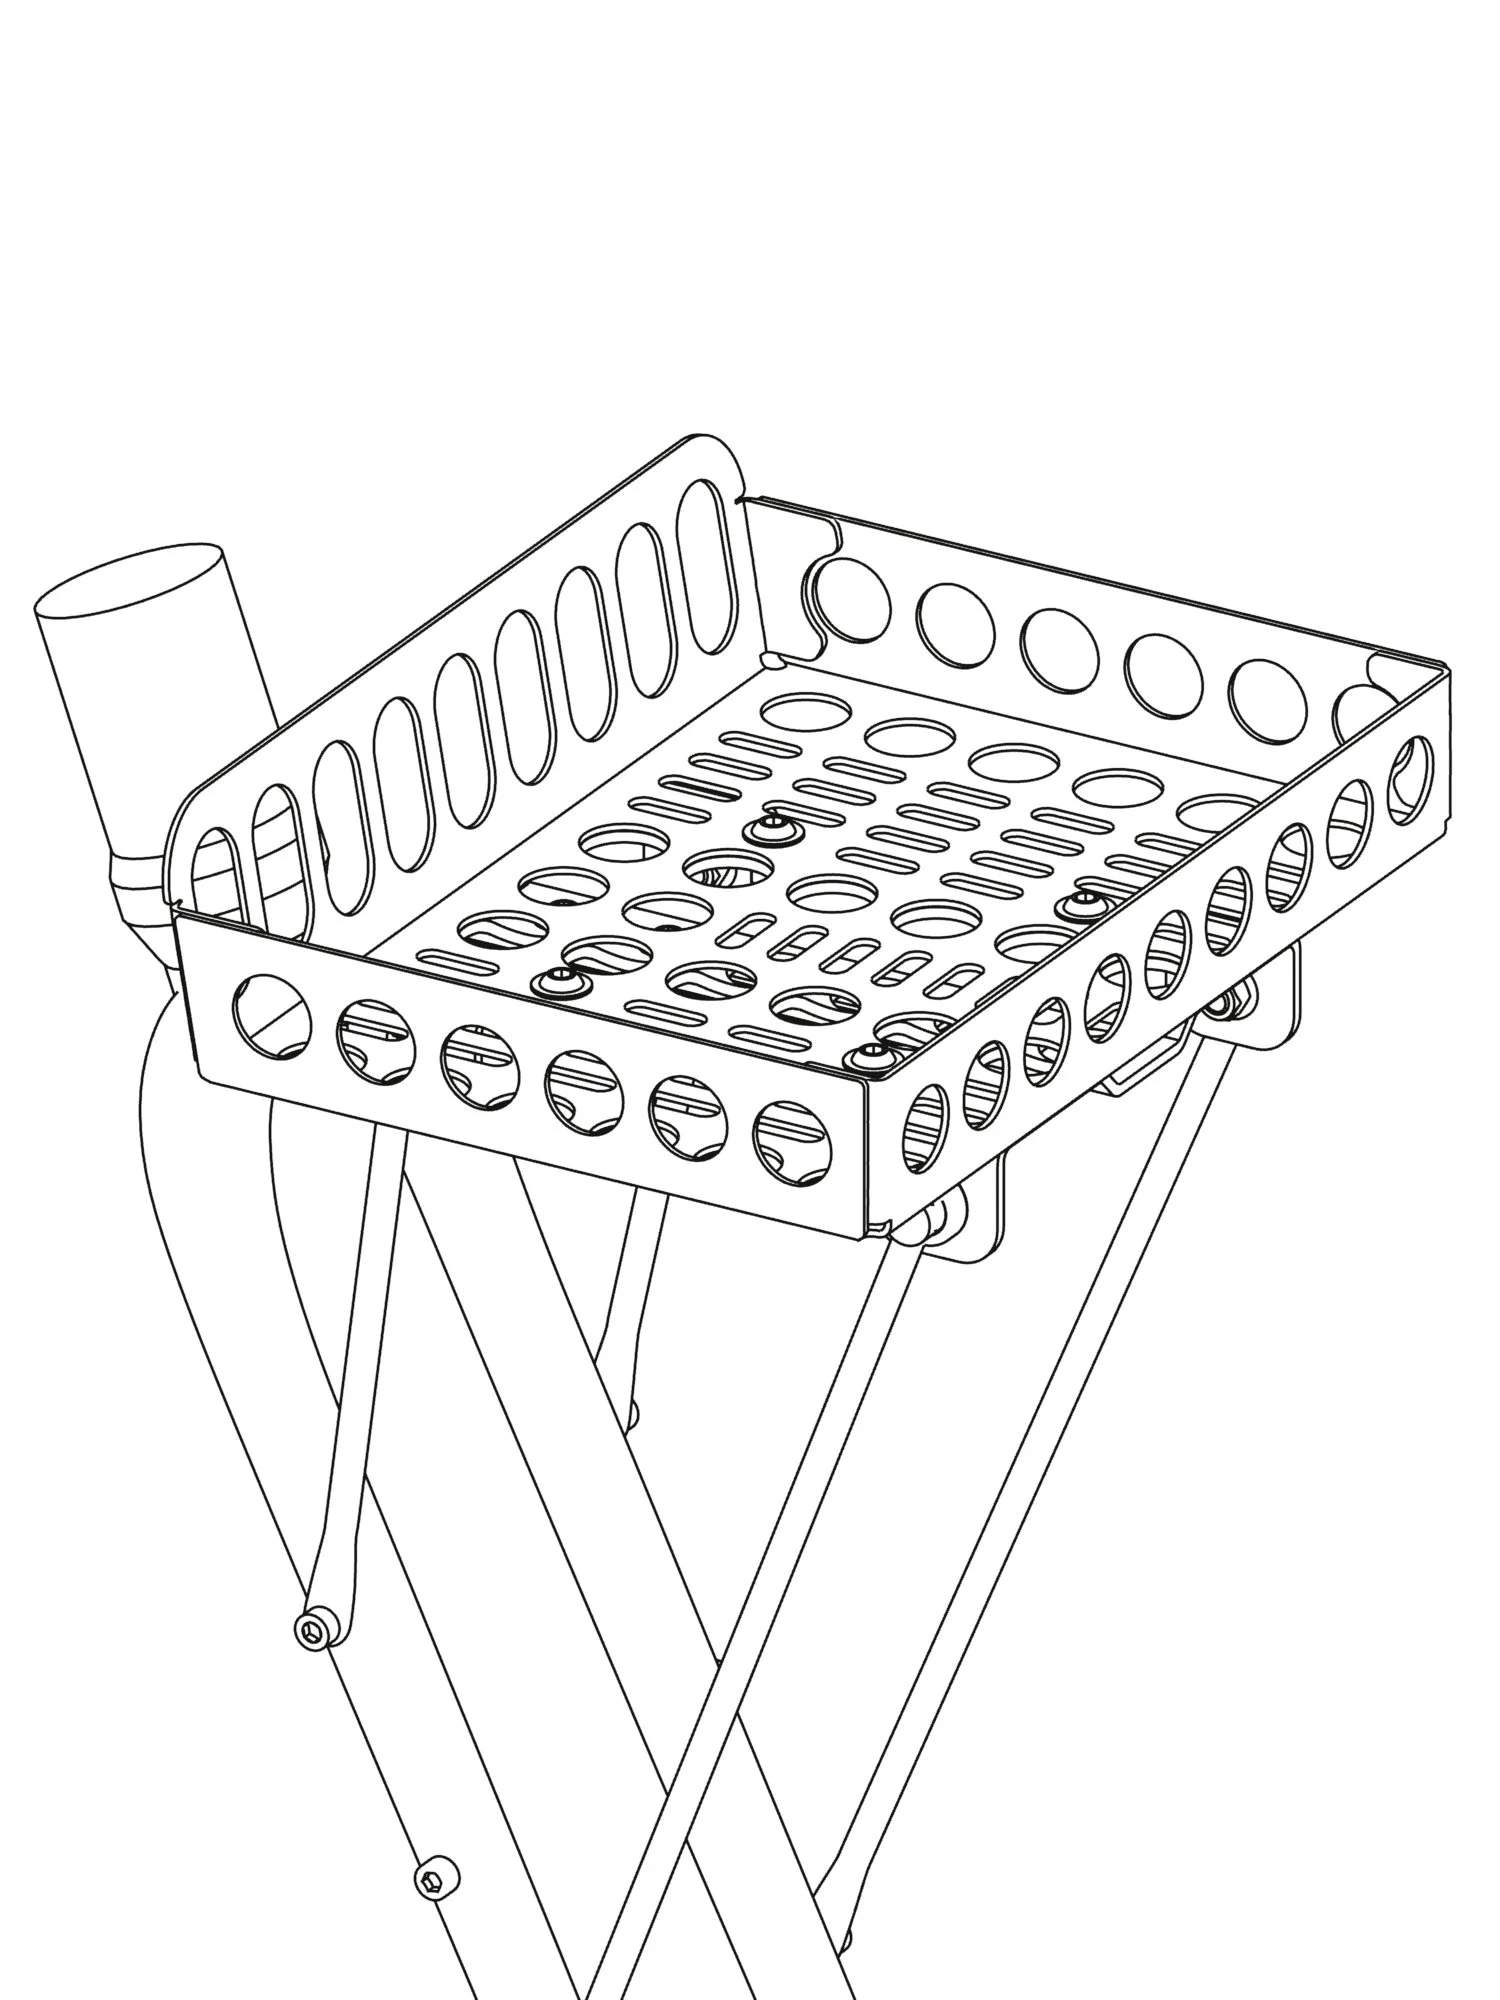
Step 11:
Install the basket to the base with the remaining M6 × 14mm bolts.
Make sure that the washers mount on the side with the nuts.
Lightly tighten the bolts and make any adjustments to the position of the basket if needed.
Step 12:
Tighten all fasteners.
M5 bolts on fork eyelets should be torqued to 5nm. All M6 bolts should be torqued to 8nm. Daruma compression hardware should be torqued to 8-11nm.
If you are unsure of your torque settings or want to double check your installation, you can always stop by your local bike shop and ask if a mechanic can check things out for you.
Regularly check your fasteners to ensure that they are tightened properly.
Step 13: (optional but recommended)
Celebrate your basket installation and go for a ride!